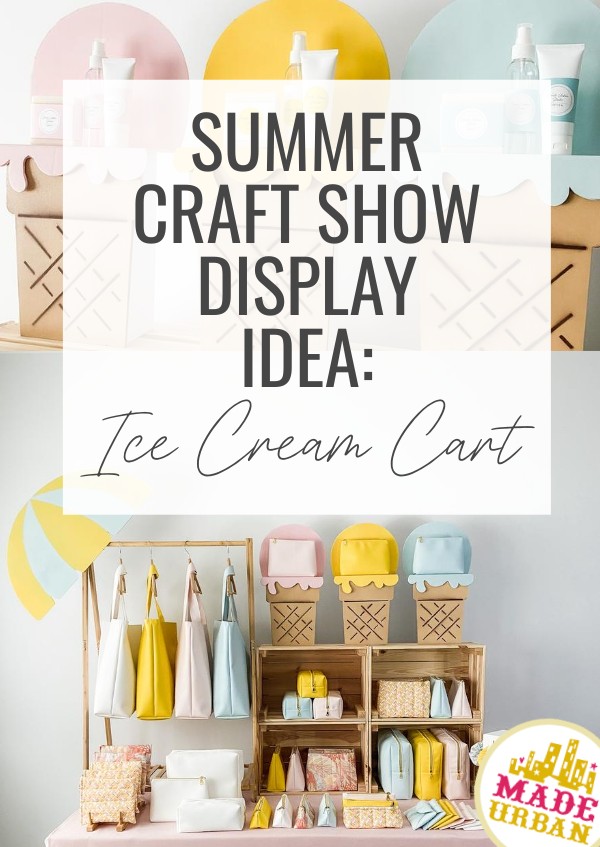
How to Display Soap at a Craft Show
Soap is often a saturated category when selling at craft shows. If you’re not competing with other soap vendors at the event, you can be sure that craft show shoppers have lots of soap options when shopping at other craft shows and markets.
So it’s important to create a soap display that stands out, looks professional, and encourages people to buy that day (and buy multiple items).
Here are 8 steps to follow to build a successful craft show display for your handmade soaps and bath & body products.
Step 1 – Define your theme
A theme can help communicate your unique selling factor or simply make your booth stand out from other soap vendors.
A theme may be based on:
- A color or colors
- Scent
- Ingredients
- A season or holiday
- A feeling or vibe
- Inspiration
- Style
- Etc.
For example, I might choose one of the following themes for my soap display:
- A pink, blue and white theme
- A citrus theme
- A natural/nature-inspired theme
- A Spring themed display
- A calm, spa-like vibe
- A candy-inspired theme
- A boho-style
The theme should influence every craft show element, which will creat cohesion across your display:
- Tablecloth
- Fixtures
- Signage
- Props
- Etc.
Step 2 – Add height
Eye level is buy level, so it’s important to have fixtures that raise your products.
It’s the level that catches shoppers’ eyes first and makes it easy for them to interact with your products. Reaching up or bending down to look at or touch products can deter sales.
Adding levels also gives you more display space and makes it easier for people to shop.
Consider what type of fixtures you can use to add height to your table, such as:
- Crates
- Bookshelves
- Tiered trays
- Plant stands
- Risers
If it’s your first craft show, start with what you have and invest profits into the proper fixtures.
You can even wrap cardboard boxes in contact paper, paper mache, or wrapping paper to create a riser that gets your soaps closer to eye level.
Whichever fixtures you choose, be sure they align with your theme.
For example, if pink, blue, and white is my (color) theme, my height-adding fixtures should be painted pink, blue, or white.
On the other hand, if my theme is nature-inspired, my fixtures should have a natural finish, such as wicker or wood. Or be a neutral color that allows other natural elements to stand out.
Step 3 – Create a high & low point
Arrange your fixtures so you have the highest point of your display at the opposite end of your lowest point.
Consider the flow of traffic at the event; are most shoppers approaching your table from the left or right?
If the entry doors are to the left of your table, consider making the left side of your table the high point. This will act to catch the eyes of shoppers and draw them into your space.
The low point will be at the opposite end of your table and will act as your checkout area.
The checkout is a designated area for people to shop your add-on items and be out of the way while you’re completing the transaction; you don’t want people standing in front of your best sellers while waiting to pay.
Having lower fixtures here makes it easier for you to hand customers your credit card reader, their change, and their shopping bag.
>> For more on how to set up a checkout area and what type of items to house in it, check out: How to Add a Point of Sale Section to your Craft Show Display
If shoppers will be coming from all directions, simply pick one side for your high point.
The right side (from the shopper’s perspective) is typically the best place for your showstopper.
*In my visual merchandising course, we were taught that the majority of shoppers will turn right after entering a store. So retailers place their best sellers/new collections/etc. in the front right area of the store. Something to consider when setting up your display.
Step 4 – Create groupings
Once you have fixtures to add height, decide on fixtures that will help you create product groupings, such as:
- Baskets
- Bowls
- Risers
- Trays
- Etc.
These fixtures will help create separation from one product to the next.
*Remember to keep these fixtures on-theme and similar to each other. If you start introducing multiple finishes in your fixtures, your display will become visually cluttered, especially once you add your products (which will add more color and variety).
Put your shoppers first and consider what type of groupings will make it easier for them to shop and will encourage multi-item sales.
For example, if I have lemon-scented bars of soap, lotion, and lip balm, it makes it easy for a shopper who loves lemon scent to find all 3 lemon-scented products. If the lemon lotion is grouped with the orange and grapefruit lotion on the other side of the table, they may not notice it (if your table is busy) or may not think to group them together.
Place one product in multiple places if needed.
For example, you may display lemon lip balms in your lemon-product-grouping as well as in your checkout area.
Play with groupings to find what makes sense together when shopping/buying, and what looks visually pleasing.
Step 5 – Add negative space
You don’t want to cram products into your space. It not only makes your display visually overwhelming, it also makes it hard to shop and can lower the perceived value of your products.
Ensure there are a couple of inches between fixtures, groupings of products, and/or collections.
>> To learn more about why your display needs negative space, check out: Craft Show Display 5-Minute Fix; Add Negative Space
Step 6 – Add testers
Display testers at the front of your table so they’re easy for shoppers to grab.
Even if your soap is packaged in a way that allows shoppers to smell any bar, having a “tester” encourages more people to pick up the soap and smell it. It also ensures your soaps don’t get “shop worn”. The oils from people’s hands can discolour soaps or labels and packaging may get wear and tear from handling.
Customers don’t like to feel like dozens of people’s hands have been on the new bar of soap they just purchased.
Step 7 – Add signage
Signage should be:
- Clear – easy to read and placed so shoppers know exactly what the sign applies to
- Simple – don’t get too wordy or unique with product names
- Professional – unless you have beautiful penmanship, stick to printed signs
- On-theme – use fonts and frames that fit your theme
You will likely want the following types of signs:
- Price signs – the more clear you can make prices, the better. I’ve heard over and over; shoppers prefer price tags on each item (if possible) and clear price signs (meaning, don’t have one price list that forces shoppers to connect the dots. If each product doesn’t have a price tag, a small price sign right next to the item is ideal.
- Business sign – you should have at least one piece of signage (typically the biggest) that communicates your brand name (and logo if you have one), and perhaps your tagline.
- Informational – you don’t want to overwhelm shoppers with information (you’re there to hop in and share applicable information with a shopper), but you may want a sign or two sharing info such as:
-
-
- Promotions (e.g. 3 for $20)
- Payment options
- Key benefits (e.g. No artificial fragrances)
- Giving direction (e.g. testers)
-
Step 8 – Add props
Props are optional, but they do help communicate your story/theme and add interest.
For example:
- A citrus theme – a bowl of lemons, props to suggest a lemonade stand
- A nature-inspired theme – potted plants or sprigs of greenery
- A Spring themed display – bouquets of tulips
- A calm, spa-like vibe – rolled-up hand towels, battery-powered candles, tabletop water fountain
- A candy-inspired theme – jars of candy, oversized candy props
Brainstorm what props fit your theme and consider if and how they can fit into your display.
Test your setup
It’s a good idea to create a mock setup at home and take photos so it’s quick and easy to create your soap display before the craft fair starts.
You should also test shopping your table to ensure nothing feels too fragile or is going to tip over when people start handling your products.
>> Here are 5 additional steps to take before you consider your soap display ready: 5 Things To Do Before Finalizing your Craft Show Display
I hope you find these steps helpful! Please let me know in the comment section if you have any questions 🙂
![Made Urband Bio](/wp-content/uploads/2023/03/make-money-craft-shows-bio.jpg)
Hey, I’m Erin 🙂 I write about small business and craft show techniques I’ve learned from being a small business owner for almost 2 decades, selling at dozens of craft shows, and earning a diploma in Visual Communication Design. I hope you find my advice helpful!