5 Steps to Create a Product Collection that Sells
I worked as a regional merchandiser for a major retailer and loved it when they sent the upcoming season’s lookbook that shared the new product collections. It was for employees’ eyes only and explained the inspiration behind each product collection.
Their collections were always named after a popular movie, phrase, song, type of person, etc. For example, “Ladies Who Lunch” was the name of a past collection.
Before even seeing the items in a collection, or reading the description, you had a clear idea of the look they were going for.
Collections were built around a theme.
This ensured that every piece within a collection worked together and that shoppers would understand the vision without a lot of explaining.
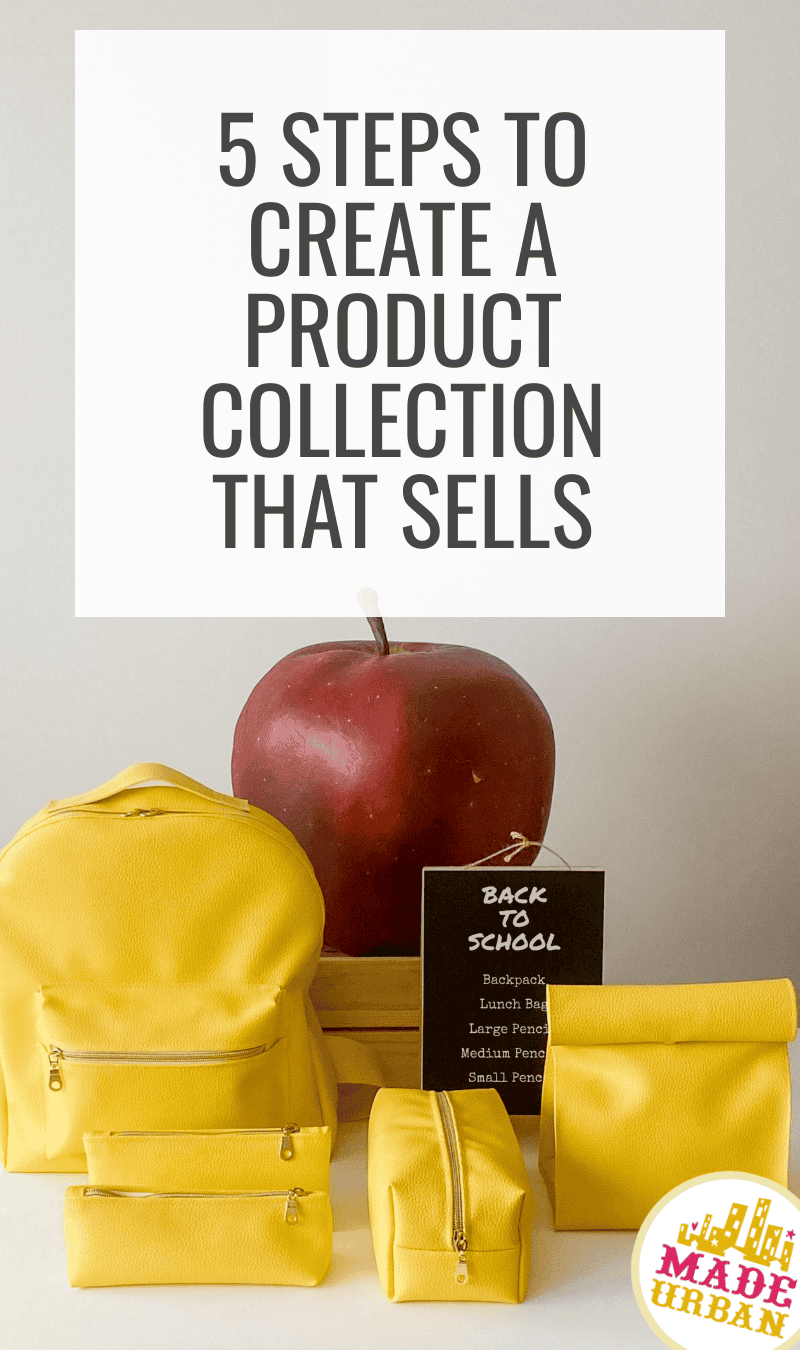
How collections can benefit your handmade business
There are many perks to building collections (as opposed to making products one at a time that don’t share commonalities). Below are a few benefits.
Collections:
- Create cohesion within your shop or craft show booth
- Tell a story and make a bold statement
- Simplify your process (instead of letting your imagination run wild with all the things you can make and all the options you can offer, you have a clear vision)
- Increase perceived value (a group of products that work together and look good next to each other seem more expensive than products that are all over the map)
- Create a marketing opportunity (the launch of your Valentine’s Day collection is something people pay attention to. “Here’s one new product I made” isn’t as “news-worthy”)
- Increase sales per transaction (customers are more likely to buy multiple items because the products within a collection work together)
- Help you sell wholesale to retailers (a well-curated collection makes your operation look more professional to retail buyers. It also gives them multiple items to purchase so they can create a full and comprehensive display in their store that speaks to shoppers).
The following are steps you can take to create a cohesive collection that attracts more shoppers and helps you sell more products.
Step 1: Start with a theme
When you build a collection, you want it to resonate and connect with others. So it’s important to choose a well-known or common theme.
An easy way to choose a theme is to draw inspiration from:
- A movie or TV show (e.g. I Love Lucy)
- A destination/location (e.g. Paris)
- An event (e.g. Oktoberfest)
- An occasion (e.g. Wedding)
- An era (e.g. the 70’s)
- A season (e.g. Spring)
- A holiday (e.g. Easter)
The themes mentioned above are a good way for a collection to tell a story, evoke a feeling, and create a connection with your target market.
However, a collection’s theme could also stem from a product feature. For example:
- Style (e.g. a business selling scrunchies may introduce an “oversized” style)
- Shape (e.g. a pottery business may create a line of square shaped dishes)
- Function/Purpose (e.g. a business selling bags may introduce a line of bags designed for school)
- Color (e.g. a jewelry business may create a red, gold, and silver collection for the holidays)
- Pattern (e.g. a business selling winter accessories may create a herringbone pattern collection)
- Prints (e.g. a business selling bags may introduce a polka-dot collection by using polka-dot printed material)
- Material (e.g. a jewelry collection incorporating pearls into each piece)
- Ingredients (e.g. a soap business may create a goats milk collection)
- Scents (e.g. a candle business may create a lavender collection)
- Etc.
To build a collection around a product feature, list your product’s key features and choose one or two to be the focus of your collection.
Keys to a good theme
The theme you choose should be simple. If you’re drawing inspiration from something (e.g. a movie) be sure it’s widely known (or at least to your target market) and don’t break copyright laws.
>> How to Avoid Etsy Copyright Infringement (is Disney & fan art allowed?)
You also want there to be plenty of repetition from one product to the next in your collection. So be sure you’re not introducing too many elements.
Step 2: Choose a color scheme
Color plays an important role in almost every product collection. It’s often what catches a shopper’s eye first and it can evoke a feeling, impact a mood, and tell a story.
So although other product features may be the focus of your collection, color will play a strong role.
Generally, the fewer colors you use in a collection, the stronger impact you’ll make.
For example:
>> An all-pink or pink and white collection has a very feminine feel and makes a strong visual statement.
>> Red, pink, and white also keeps the story clear (feminine/romantic/Valentine’s Day/etc.).
>> However, red, pink, white, blue, yellow, and orange doesn’t have a clear message.

Start with your collection’s theme and choose a color scheme that works with it.
For example, if I’m creating a collection of bags for school, I may work around a primary color scheme.
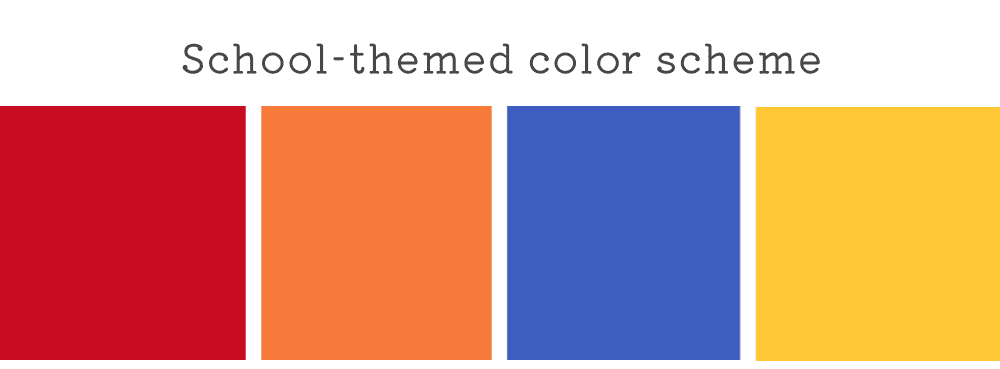
3 – 5 colors, or shades of a color, is usually the sweet spot for a color scheme.
If your products don’t incorporate color (e.g. white candles with black and white labels), you should still consider how color will play a role in your product photos or craft show display.
For example, if a candle company is creating a lavender collection but their candle wax and labels don’t change color from scent to scent, they may want to photograph their lavender candles with a lavender-colored background. At a craft show, they might find ways to incorporate props that communicate the scent (e.g. sprigs of lavender).
Step 3: List theme elements
Once you have a theme, define what is commonly associated with that theme.
Again, consider the masses; not your personal experience.
For example, my wedding was small and indoors at a local botanical garden, so I may associate tropical plants and a humid atmosphere with “wedding”. However, most people would not make the same association.
You also want to consider your target market.
For example, the patterns, symbols, fonts, etc. one associates with a wedding will vary depending on that person’s style, culture, religion, and other demographics.
Based on your chosen theme, define the associated:
- textures
- patterns
- scents
- fonts
- objects
- places
- people
- icons
- symbols
- images
- keywords
- feelings
- etc.
Examples
I’ve listed several elements for each example theme below.
Theme: I Love Lucy
- red, navy, and white color scheme
- polka dots
- gingham
- hearts
- pearls
- black and white television/photos
- 50’s
Theme: Paris
- black and white color scheme
- love/romance
- Eiffel tower
- beret
- wine and cheese
- cafes
- croissants/french bread
Theme: Oktoberfest
- orange, blue, and white color scheme
- beer
- Germany
- accordion
- lederhosen
- Tyrolean/Alpine hat
- corset
- red & white gingham
- Bavarian blue & white diamond pattern
- braided pigtails/crown
Theme: A wedding
- pink, teal, and white color scheme
- flowers
- hearts
- lace
- love
- something blue
- champagne
- rings
- Church
- bride and groom
- bridesmaids/groomsmen
- “I do”
Theme based on a product feature: School bags
- blue, red, orange, yellow
- pencils/erasers/crayons/highlighters/etc.
- books/notebooks
- lined paper
- backpacks
- pencil cases
- lunch bags/boxes
- chalk/chalkboards
- subjects (e.g. math, science, etc.)
- paper airplanes
- school bus
- apples
- “back-to-school”
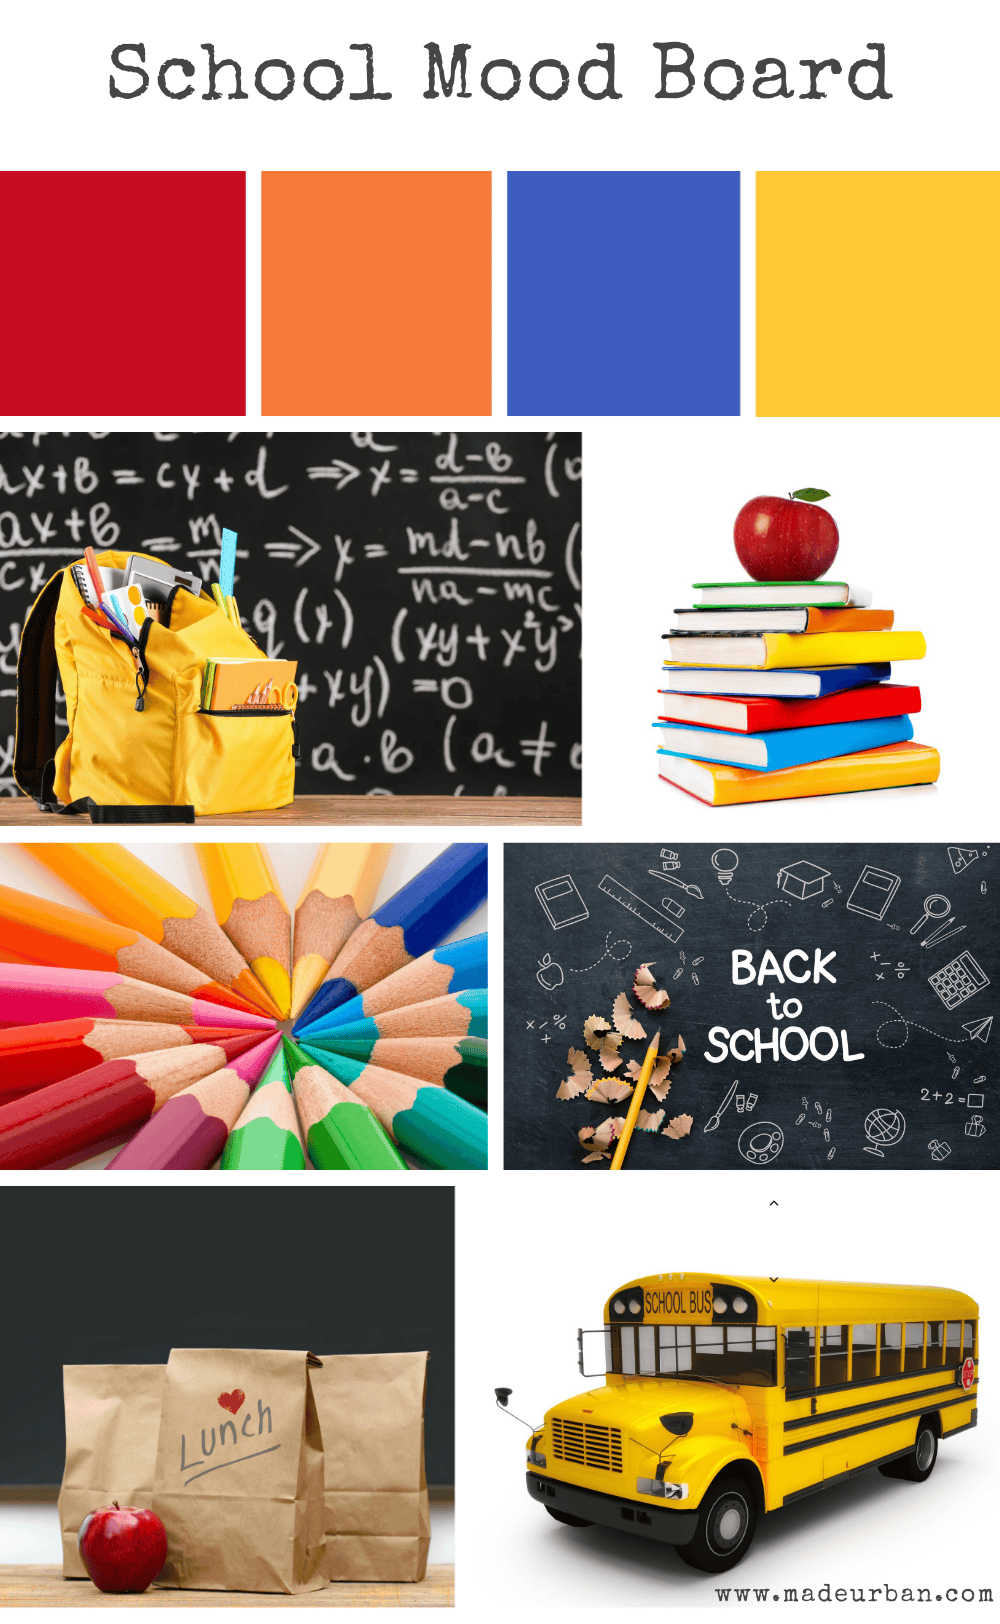
You may find it beneficial to create a digital or physical mood board.
Search the web and save images to a document or create a board on Pinterest full of inspiration. This would be for your eyes and use only.
Step 4: Apply theme elements to your products
Not every theme element will apply to your products. Choose ones that can be communicated through your product’s features.
For example, patterns/prints are easily applied to bags but not to candles. On the other hand, scents, keywords, and fonts are good elements to apply to candles and their labels.
It’s also important to keep your collection simple. Trying to incorporate too many elements may confuse your collection’s story.
Choose 1 – 5 key elements to apply to your products.
Theme elements that can’t be applied to your products may work into your product presentation (e.g. craft show display, product photos, store display, packaging, hang tags, etc).
For my line of bags for school, I’ll pull the following theme elements into my products:
- pencil cases
- lunch bags
- backpacks
- I may use school bus or subject-themed material for my bag linings
Step 5: Choose 3 – 5 products that work together
Within a collection, every piece must work together.
Each product should relate to your theme, incorporate one or more of your key elements, and follow a purchasing theme.
By “purchasing theme”, I mean items that are commonly purchased together.
For example, someone who sews may be able to make purses, pajamas, and aprons out of their chosen material. But most people don’t wear a purse, pajamas, and an apron at the same time.
On the other hand, someone wearing an apron would also use a tea towel, oven mitts, hot-cloths, and reusable bowl covers at the same time.
Those items fit under one purchasing theme (i.e. kitchen linens).
Consider price points too.
If the products within a collection have varying price points, more shoppers will be able to find something that fits their budget.
Plan, design, and create 1 – 5 products that work together and are commonly purchased together.
For example:
- Theme: School
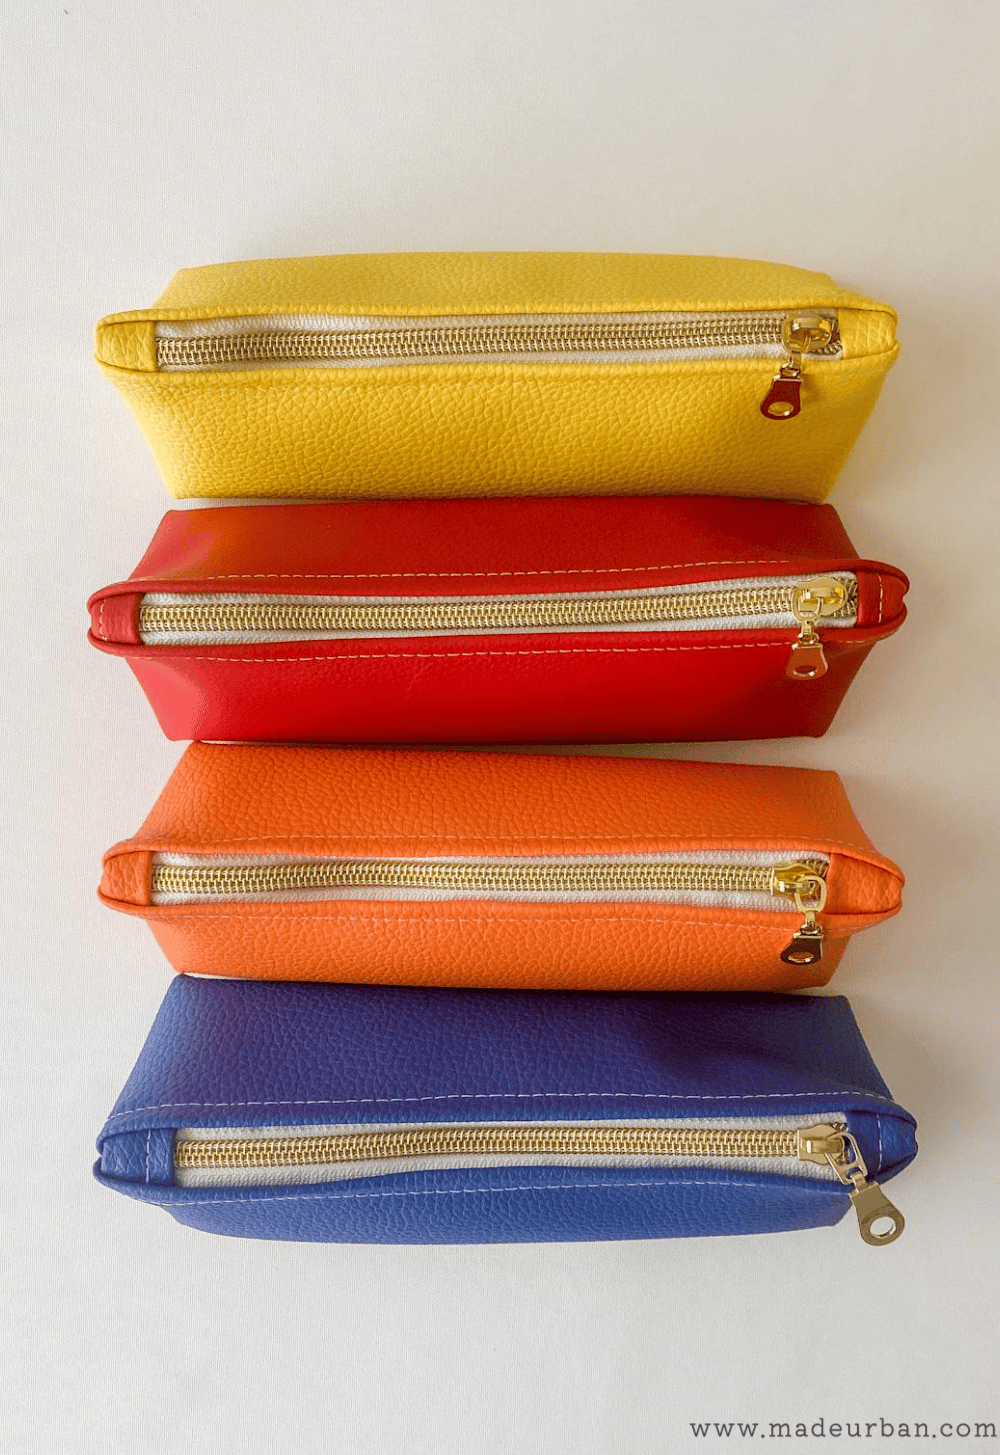
- Color scheme: red, orange, blue, yellow
- Key elements: pencil cases, lunch bags, backpacks, and school-themed lining
-
Purchasing theme: bags to hold school supplies
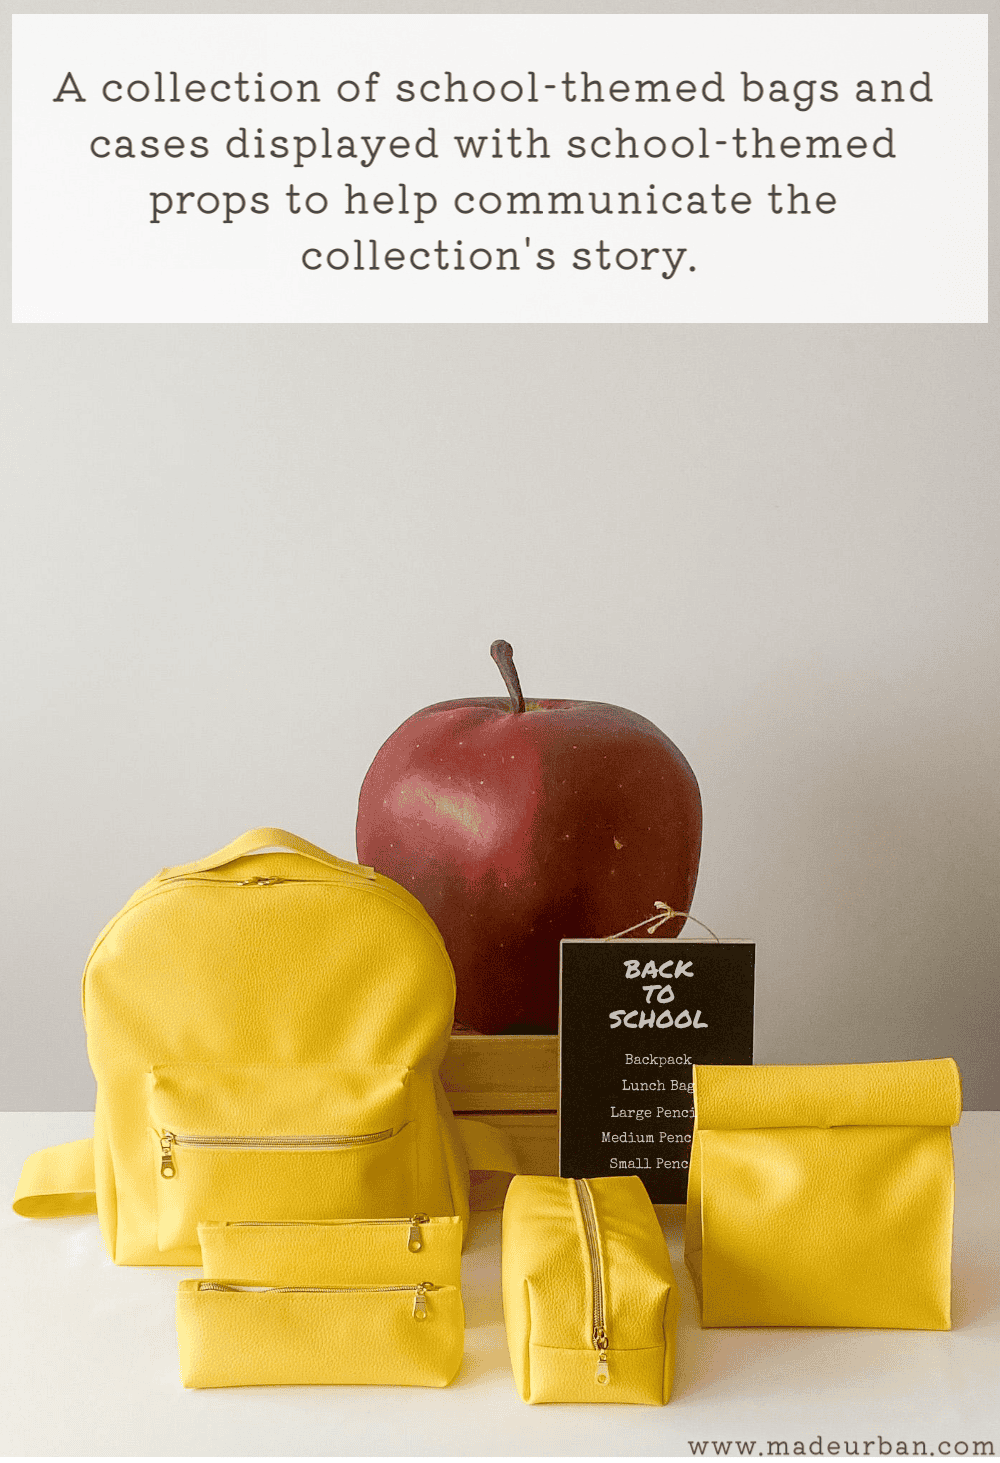
- Backpack
- Lunch bag
- Large square pencil case
- Medium triangle pencil case
- Small rectangle pencil case
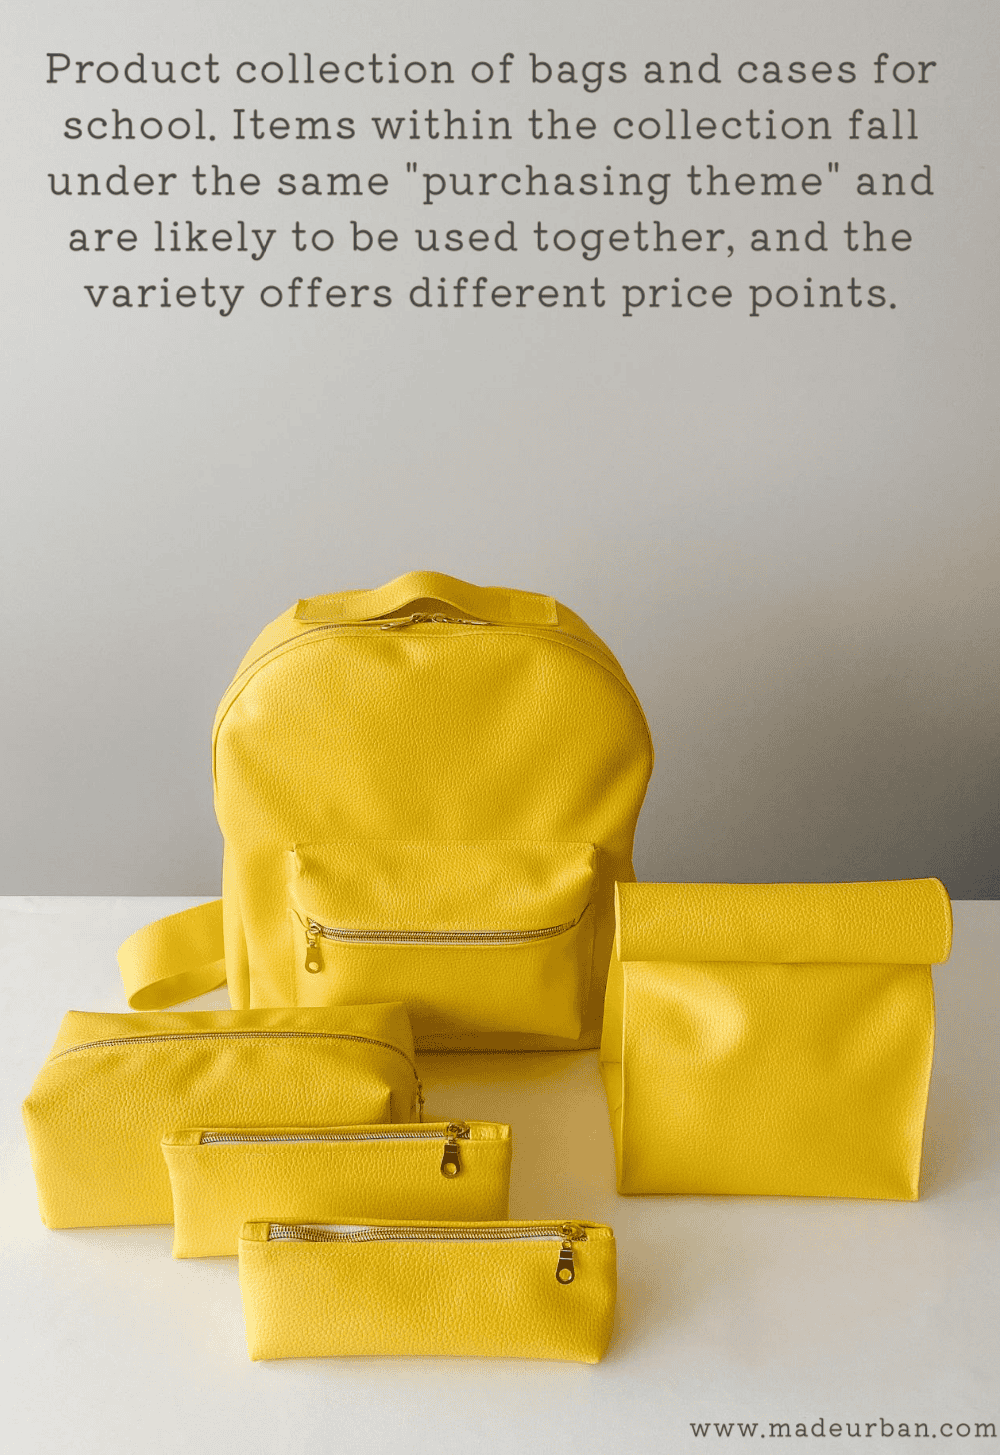
I would create each of these products in yellow, red, orange, and blue.
Collection Presentation
To help communicate the inspiration behind your theme, incorporate theme elements into your product presentation as well.
Take the key elements you listed, and determine if/how they can be applied to different areas of your sales channel(s).
Online
For Etsy or your website, you may incorporate key elements into:
- product backdrop
- photography props
- lighting
- keywords can be applied to the collection name (don’t break copyright laws), listing titles, and descriptions
To go with my school theme, I may:
- Use a chalkboard backdrop or photograph my products on a desk
- add pencils, books, apples, or other school-themed props
- I might want to make my photos appear bright and sunny to create a cheerful vibe (as opposed to dark and moody)
- name my products appropriately (e.g. “pencil case” instead of “zipper pouch”)
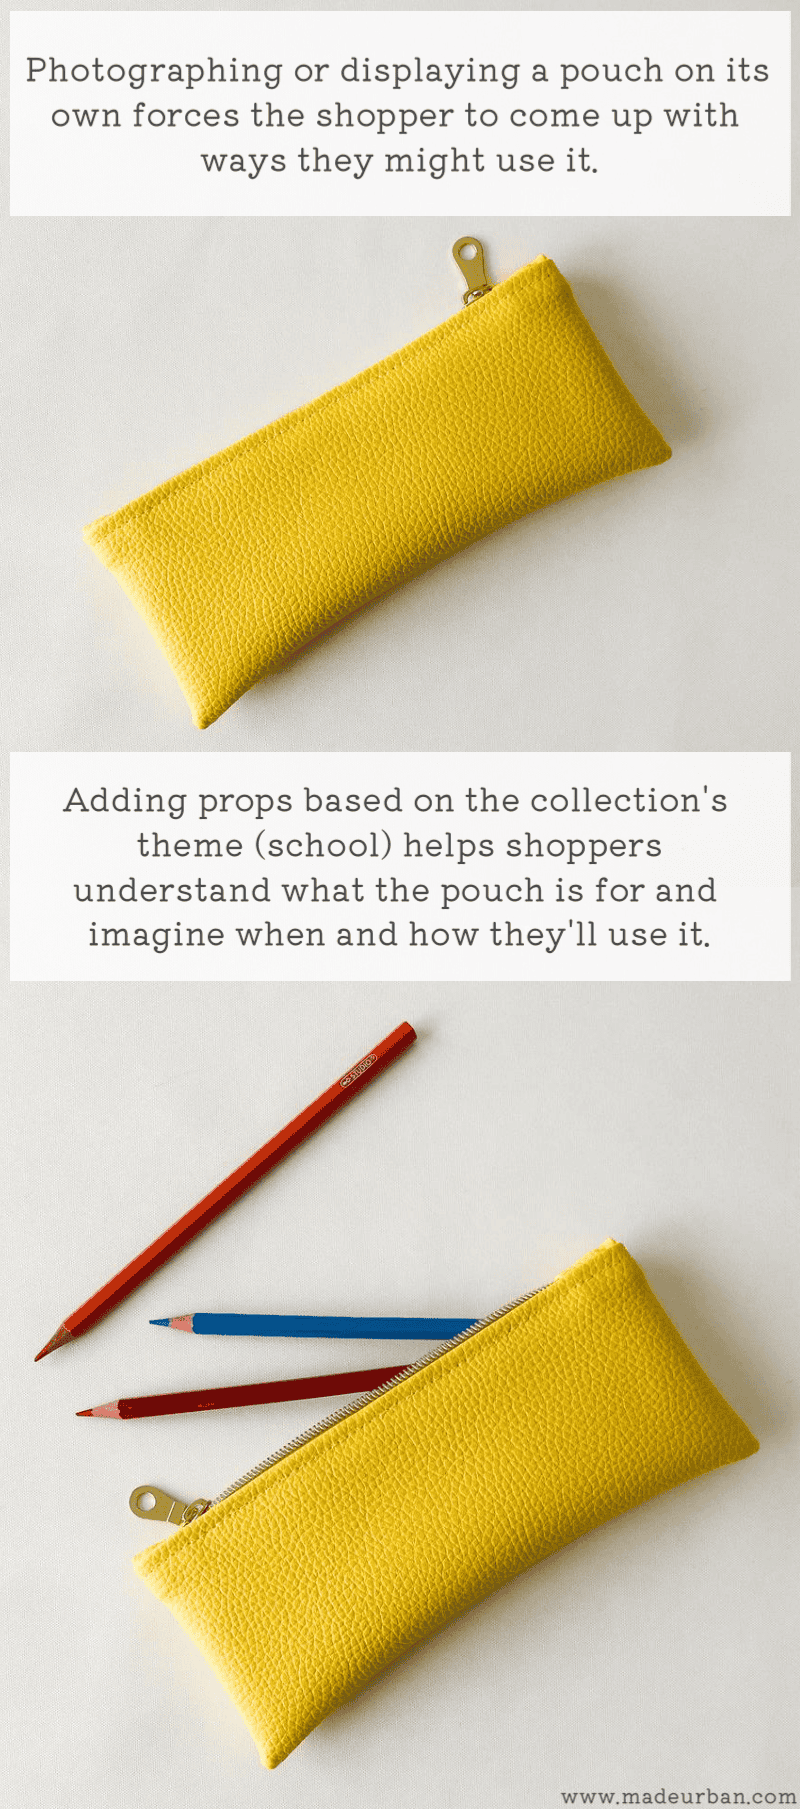
Also, be sure to add a photo to each listing that shows some, or all, of the items within a collection together. Otherwise, if shoppers land directly on a listing, and don’t visit your shop/browse your website, they won’t know there are matching items they can also buy.
Craft show
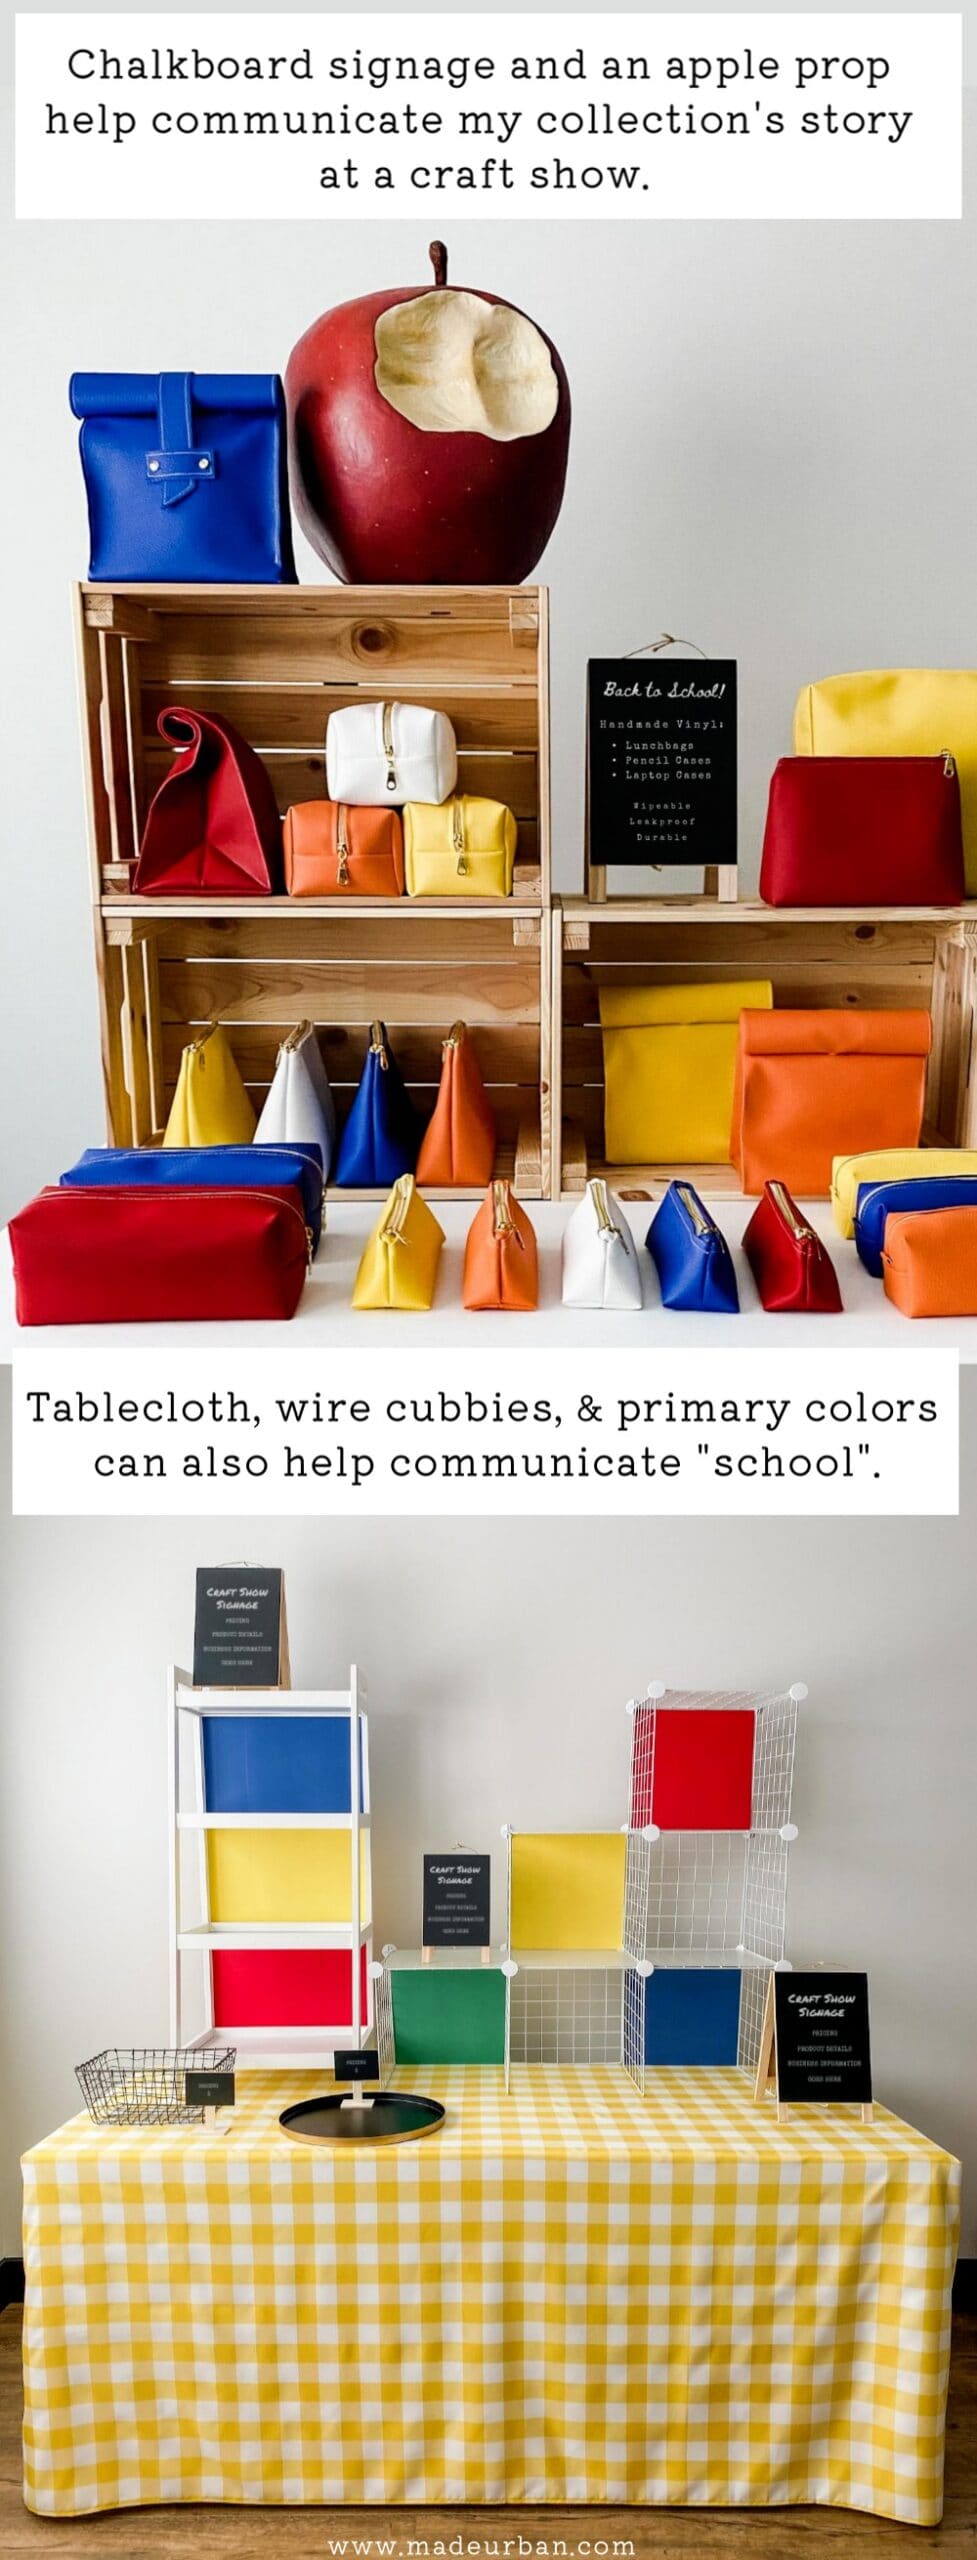
At a craft show, you may incorporate key elements into:
- tablecloth color/texture
- display fixtures
- props
- your attire/outfit
- music playing in your booth
- images/photos
- signs and keywords used
- sales pitches and how you describe your pieces/explain your inspiration to shoppers
- scents (e.g. the scent of fresh flowers can communicate romance/love; try not to use strong or synthetic fragrances)
For example, for craft show props, I could incorporate:
- chalkboard signs
- coiled notebooks or stacks of textbooks
- pencils, pencil crayons, pens, etc.
- apples
- paper airplanes
- etc.
This would help communicate my “school” message. If someone is looking at a pencil case on its own, they may not get “school” from it right away; they may think it’s a makeup bag. However, photographing it with pencil crayons helps shoppers immediately understand what its purpose is.
I hope this article helps inspire your next collection!

Hey, I’m Erin 🙂 I write about small business and craft show techniques I’ve learned from being a small business owner for almost 2 decades, selling at dozens of craft shows, and earning a diploma in Visual Communication Design. I hope you find my advice helpful!

I learn so much from your resources!!! My in-person sales have really soared since reading your blog posts. Thank you SO much for offering all of your insight & detailed how-to’s for free. It is so appreciated!
Thanks, Erin
Perfect timing. I’m in the midst of making a spring/summer collection. My elements include: flowers, fruits, celebrations and vacation time. Thank you for this very timely blog.
Natalie M.
This article really hit me with some great points and ideas. Your articles are very helpful.
I love it. Thank you.
Thank you for this article, good tips!
Easy, through, and fun system for creating a collection. Love the illustrations and format. I almost had my collection created by the time I finished the post.Thank you
Thank you so much for these tips. I dont make craft items but this has been such a help in thinking how to group and create cohesion in my antiques and collectibles stall. Super inspiring ideas.
Where can I buy all of this information in book form please.
Thanks
Caroline
Where can I get a download copy or hard copy of this blog. Its really inspired me although I dont do homemade but have a collectibles website and also at craft markets. Thank you. Most inspiring.
Regards Caroline
I always get excited when I receive an email from Made Urban. Erin provides the BEST suggestions for small business owners to succeed. Thank you, Erin, for your dedication to providing the best information!
Love your article Erin; it takes the reader through every aspect of building a collection in such a clear manner. A great read! Thank you!