7 Visual Merchandising Terms to Improve your Craft Show Sales
These are a few important terms we use in visual merchandising. They can be helpful concepts to understand for your craft show display.
Although they’re typically used when referencing larger retail stores, many ideas can be applied to a 6 foot table and a handmade product line.
1 – Hot Spot
A hot spot is an area in a retail store that shoppers gravitate towards. Because it gets a lot of attention and traffic, it’s a good spot to merchandise high-profit products, best sellers, new products, etc.
At a craft show:
Pay attention to shopper behaviour at your table. In your setup, do shoppers tend to be drawn to one section first? Do they pick up/interact with items from one fixture more than others? Do items in one section of your display sell quicker than others?
Determine the hot spots within your setup so you know where to place the product you want to sell the most of.
2 – Zone 1
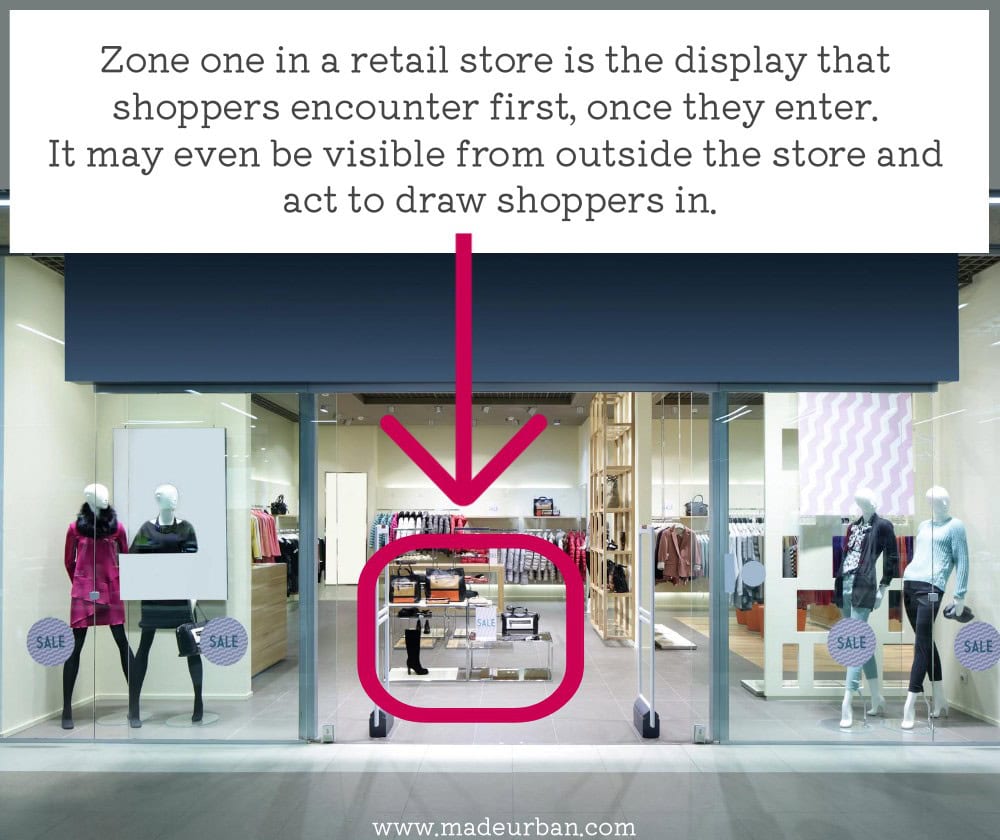
Zone one in a retail store is the display/section shoppers encounter first once they enter. Some Zone ones can be seen from outside the store and attract shoppers in.

Product merchandised here should engage shoppers and get them to slow down.
Retail stores don’t want shoppers walking through their stores at the same pace they walk through a mall or down the street.
They want them to stop for a second, take in their surroundings, and get into the same mindset/mood/vibe/feeling as their brand and products (e.g. feel calm and relaxed when shopping bath and body products).
At a craft show:
Your zone one may change from event to event, depending on where your booth is in the venue. You want shoppers to be able to see your zone one as they’re walking down the aisle; it should draw them in at the beginning of your space.
Products displayed here should be exciting, eye-catching, and intriguing.
Read more about zone one and what to put in your other two zones here: Craft Show Table Layout Tips
3 – P.O.S.
P.O.S. stands for point-of-sale in retail (it can also refer to a point-of-sale system such as a Square reader used to process transactions).
The point-of-sale is the checkout desk and is important in visual merchandising because the products displayed here should be items customers can easily add to their existing purchase.
While waiting for the cashier to ring through their purchase, a shopper can browse items that are a lower price point and make sense to buy with the item they’re already buying (e.g. shoe protector when buying a new pair of shoes).
Low price points mean they don’t have to think too long about adding the item to their order; they’re perfect for impulse buys.
At a craft show:
Be sure to have items customers can add to their existing purchase and display them where people will stand as they’re waiting to pay.
“Lower price point” will be relative to your average price point, but at a craft show, generally, $5 – $10 items are a good price range for P.O.S items.
For more ideas, check out: How to Use Add-Ons to Sell More Handmade
4 – Cross Merchandising
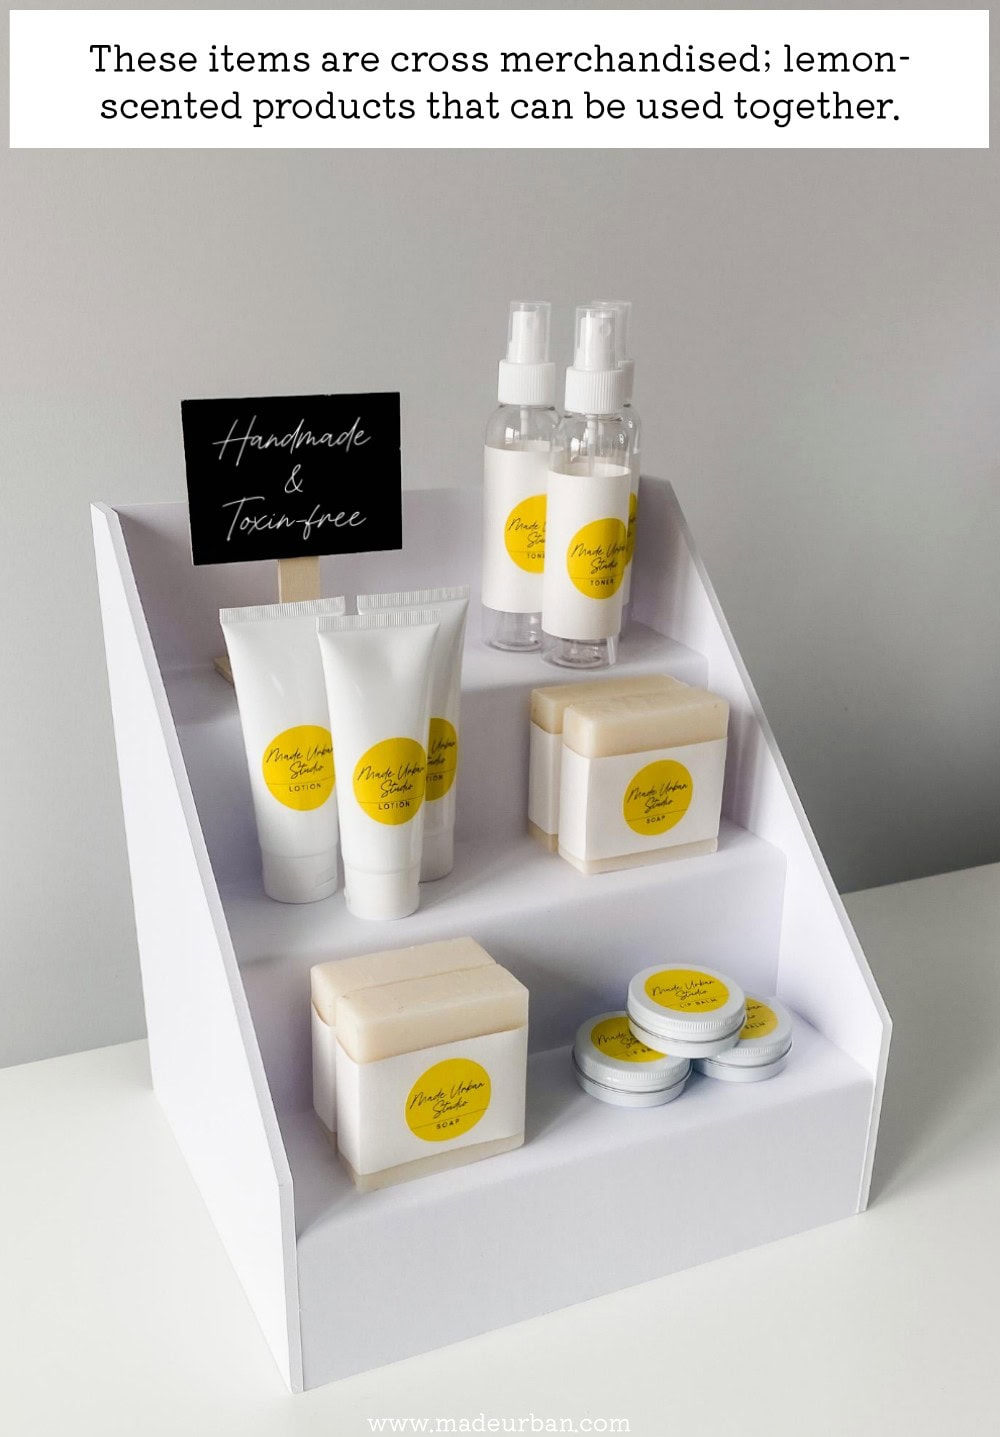
Cross merchandising is the act of grouping items in a display that are commonly used/purchased together. This helps paint a picture for the shopper as to how an item might be used and encourages multi-item sales.
For example, instead of seeing a yellow top displayed with its other color options (e.g. a table full of the same top in every color offered), that top might be displayed on a table with a stack of light coloured jeans and a white cardigan.
Now the shopper can see the full picture; what the top might be worn with to create a Spring outfit. And instead of just buying the top, they may buy the jeans and cardigan too. Which they likely wouldn’t do if those items were merchandised on the other side of the store.
At a craft show:
Instead of grouping by product type (e.g. all bars of soap together on one fixture, all lotions together on another fixture), group items based on what customers are likely to use together (e.g. lemon-scented bar of soap, lotion, toner, and lip balm grouped together).

For more info, check out: How To Cross Merchandise in a Craft Show Display
5 – Sight lines
In a retail store, a shopper should see several focal points as they stand at the front or walk around. If tall fixtures/displays at the front of the store block their view to the back of the store, there’s nothing to grab their attention and draw them in.
At a craft show:
In a table display, sight lines don’t come into play as much. However, you do want to create a tiered effect with your set up; lowest displays at the front of the table and the highest displays at the back.
The same idea applies in a larger booth. You may want a taller display at the front corner, as that is your zone one and should grab attention, but then taller displays at the back of your booth will help draw shoppers in.
You should also consider sight lines within the venue.
You want shoppers to notice your booth and be drawn to it. So consider how your display looks from several feet away.
>> Can shoppers see any part of it?
>> Are any elements visible over people’s heads when the aisles are full?
Look for opportunities to raise your display, even if it’s an eye-catching banner or picture displayed at eye level or higher.
6 – Eye level is buy level
This is a popular phrase in visual merchandising because it reminds merchandisers to place the most important product at eye level.
This is where shoppers naturally look as they’re walking, so they’re more likely to notice the products merchandised at this height. It’s also easier to shop items at eye level as the shopper doesn’t have to reach up or bend down.
At a craft show:
Be sure to work in fixtures that raise your products to eye level and make it easy for people to shop them. Not only does this give you more display space to work with, it also makes your products more noticeable.
7 – Dogs
This term is last because I’m not sure it’s as widely used. But I wanted to include it to communicate how important it is to recognize which products shoppers aren’t interested in and act accordingly.
A “dog” is an item that’s not selling or is selling slowly.
In a retail store, it’s important to identify these items to ensure they aren’t being merchandised in important spots (e.g. hot spots or zone one).
When working with seasonal or trendy items, we have to work fast. We can’t force shoppers to love an item; we have to let the shoppers tell us what they love (which is based on sales, not what they say they love) and adjust merchandise accordingly.
At a craft show:
It’s important to track sales stats at craft shows (here are 7 Stats to Track at Craft Shows (to improve sales)) and adjust your product line and display based on the information you gather.
If something isn’t selling, don’t keep bringing it to craft show after craft show and giving it a quarter of your table. Give it less space in your display or even keep it behind the table (and bring it out if you discover, through conversation, that a shopper might be interested in it).
You have limited space and limited time to sell at craft shows. Make sure your business is putting its best foot forward by displaying its most popular products.
You may also be interested in: 5 Visual Merchandising Mistakes to Avoid at a Craft Show


Hey, I’m Erin 🙂 I write about small business and craft show techniques I’ve learned from being a small business owner for almost 2 decades, selling at dozens of craft shows, and earning a diploma in Visual Communication Design. I hope you find my advice helpful!

Hi Erin,
Your newsletters are so helpful so I wanted to thank you for sharing your knowledge with us craft marketers! I have a question: Do you use a company to make your small bags or do you buy the fabric and sew them yourself? I am an artist and looking to purchase small bags for pencil cases/art supplies that I can have my artwork placed on and I am having trouble finding a company that seels a good quality (not so expensive) bag. If you do use a company or know of one, I truly would appreciate a recommendation. Thank you so much! Feel free to email me personally if you don’t want to share to the public.
P.S. I just found your “how I made a craft show display riser for under $10” and I am going to make one this weekend!!
Hi Jen,
I’m so glad you find them helpful! Thank you for reading 🙂
I make my my bags (anything you see sewn is made by me; I buy other items wholesale (e.g. soap) to help explain my concepts for different types of products.
Have you checked out services such as Printify? (https://printify.com/) It’s print on demand but I’m sure you could have the finished product simply shipped to you (instead of customers). I’m not sure of their quality or types of bag options they offer to have your designs printed on, but it may be an option.
Society6 is another option: https://society6.com/collections/bags but it looks like they currently have their artist registration on pause https://society6.com/pages/sell-art
If you search “print on demand” you’ll find several companies that offer this service.
I hope that helps!
~Erin