Craft Show Display Ideas Using Crates
Crates are a great item to add height and display space to your craft show display.
Not only that, they also double as bins to transport your products to and from a craft show.
Here are a few tips and ideas when working with crates in a craft show booth or on a craft show table.
*This article includes affiliate links, meaning I get a commission if you decide to purchase through my links, at no cost to you. Read full disclaimer here.
Where to buy wood crates for a craft show display
I purchased my crates from Ikea but there are several places to explore to find ones that fit your requirements. Here are places to check:
- Ikea
- Amazon
- Walmart
- Home Depot
- Canadian Tire
- Dollar stores
- Hobby Lobby/Michaels
Buying Tips
When shopping for crates, be sure to:
- Compare the size of your products to the size of crates.
- Check the weight to ensure it will be sturdy enough for shoppers (or wind if setting up outside).
- Check that there isn’t too much spacing between slats if you have smaller products.
- Look for crates that come in different sizes to add interest to your display and give yourself options for the different products you make. You may be able to find a nesting set of crates.
- Check the bottom to ensure it has a flat surface if you plan on using them as risers.
1 – Add angles
If your craft show table is on the end of an aisle, you want to take advantage of that space.
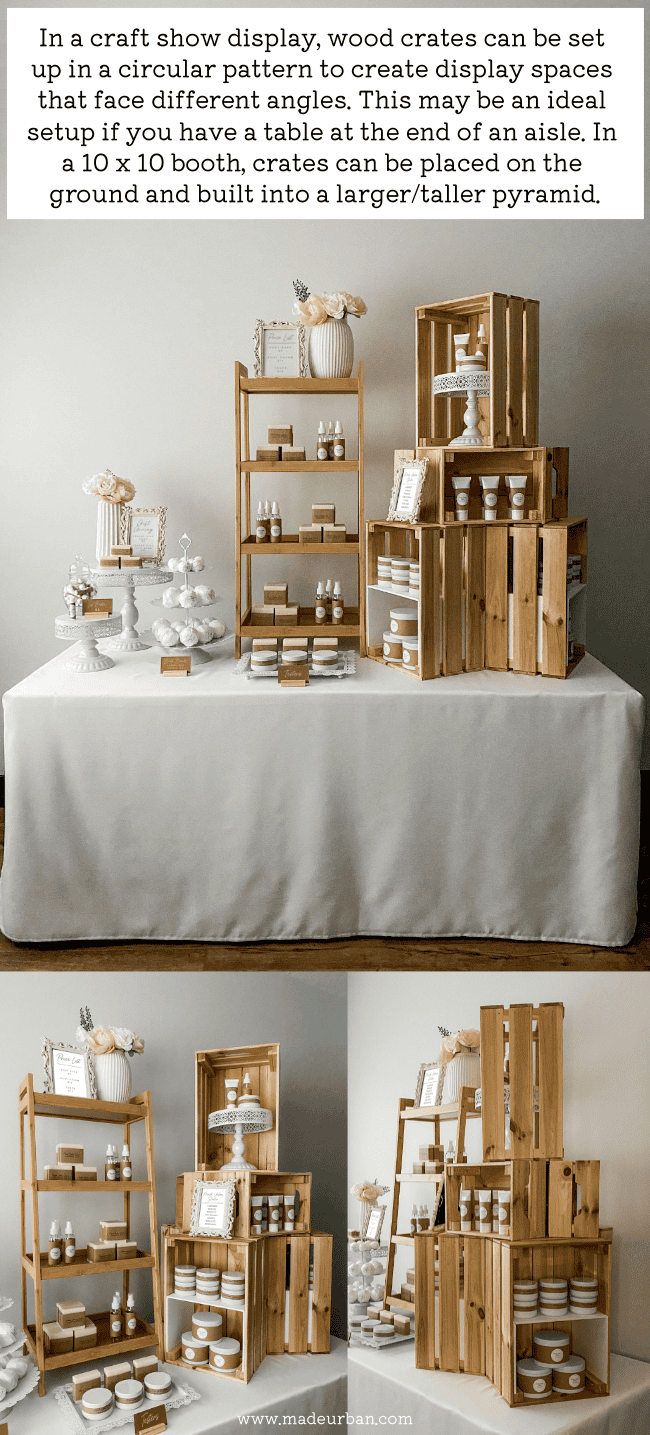
Setting crates at angles to create a circular shape will allow your display to catch shoppers’ attention from different angles.
Here’s an example of wood crates set up in a circular shape.
If you have a 10 x 10 craft show booth, you may set your crates on the ground and build them up higher.
Products shown in photos above:
-
4-tier ladder shelf (currently available in white and black)
- Bamboo options:
- Metal cake stand 10-piece set
2 – Hanging space
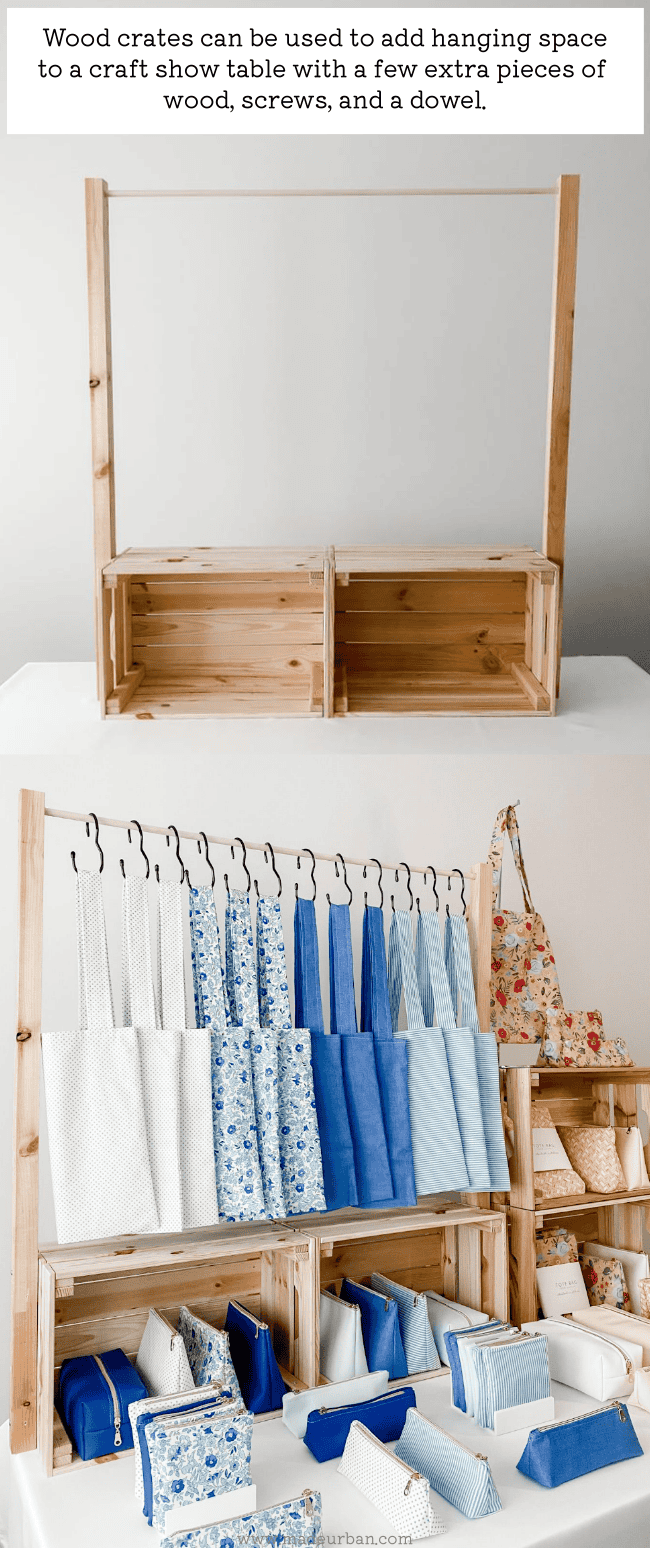
With a couple more pieces of wood and a few screws, you can use wooden crates as the base for a hanging rod.
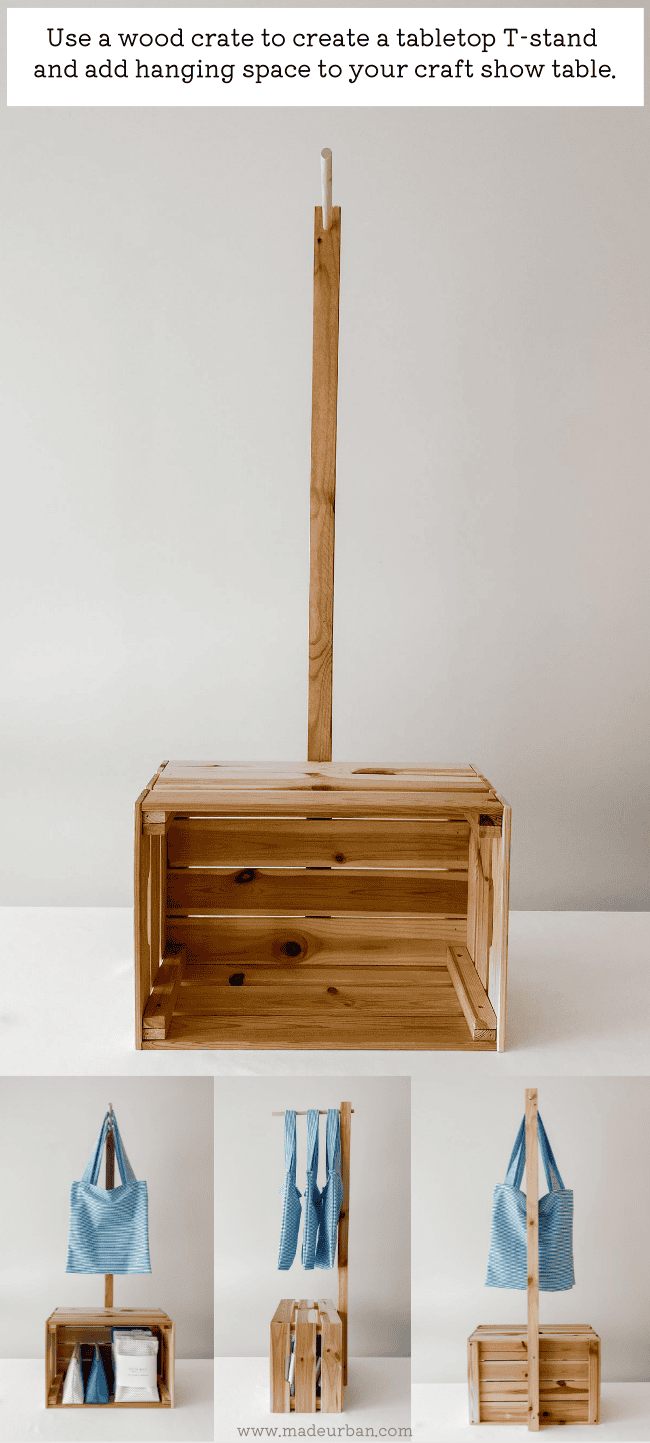
Or you may use one crate to build a tabletop T-stand.
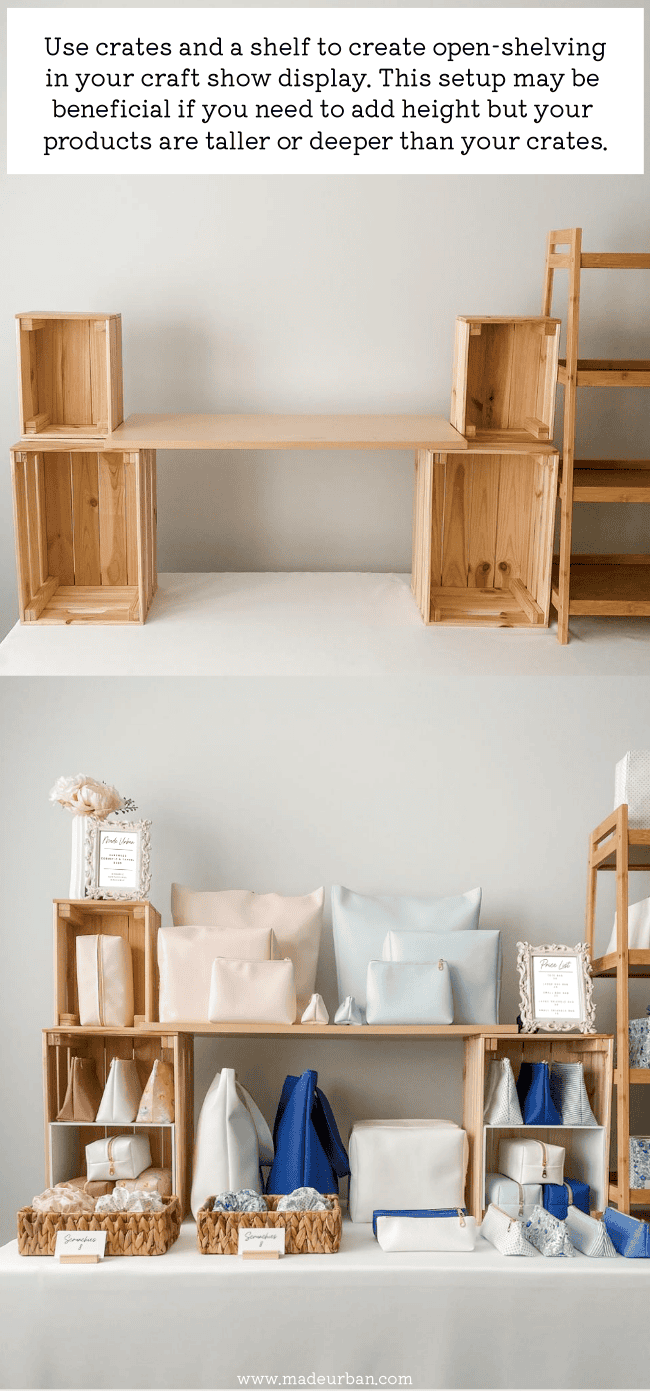
3 – Open shelving
Use wood crates as a base for a shelf to add height and more display space.
This option will be ideal if your crates have too much space between the slats for your products, or the openings aren’t the right size for your products.
4 – Checkout stand
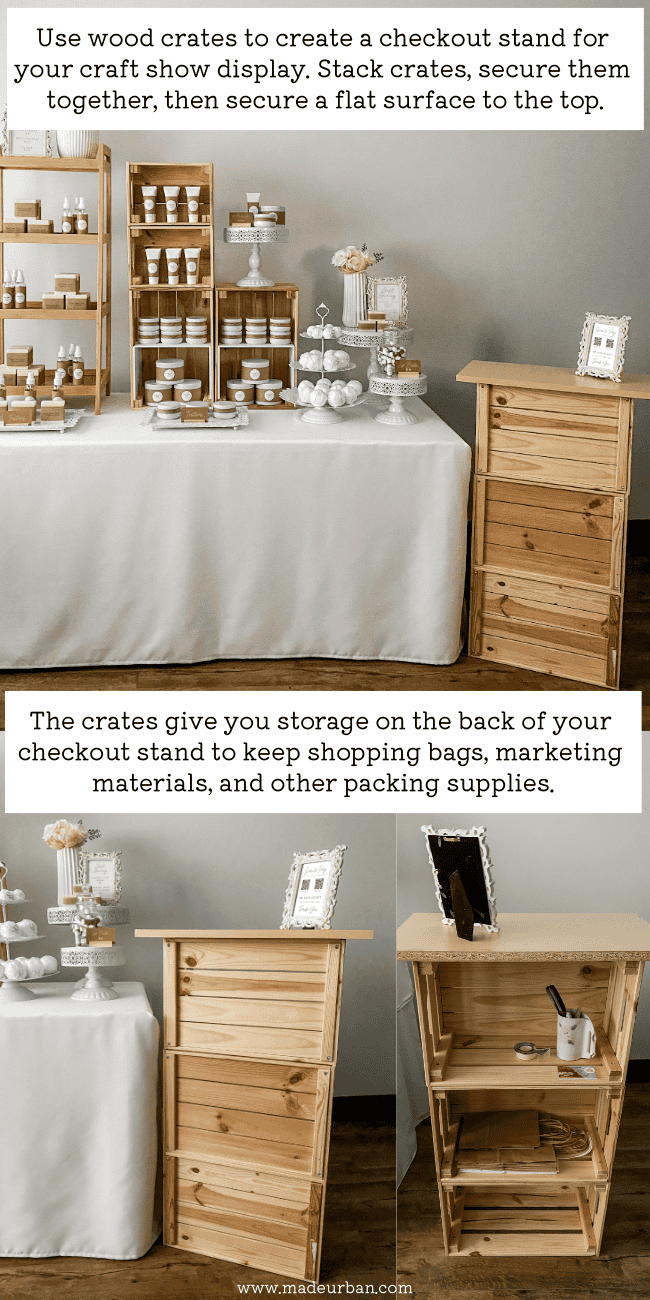
If you have space next to your table, or you have a 10 x 10 booth, you may use crates to build a checkout stand.
The openings of the crates can house your shopping bags, marketing materials, extra tags, etc.
You’ll likely need a piece of wood to secure to the top of the crates so it creates a flat surface shoppers can place their wallet on while paying.
Products shown in photos above:
-
4-tier ladder shelf (currently available in white and black)
- Bamboo options:
- Metal cake stand 10-piece set
- Crates are from Ikea
5 – Christmas tree shape
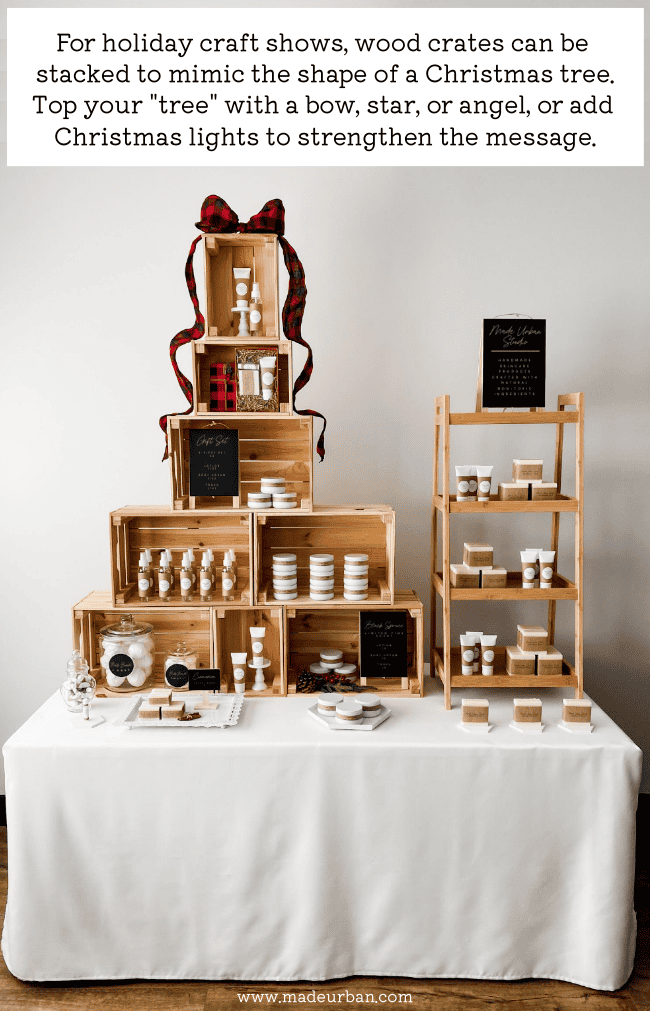
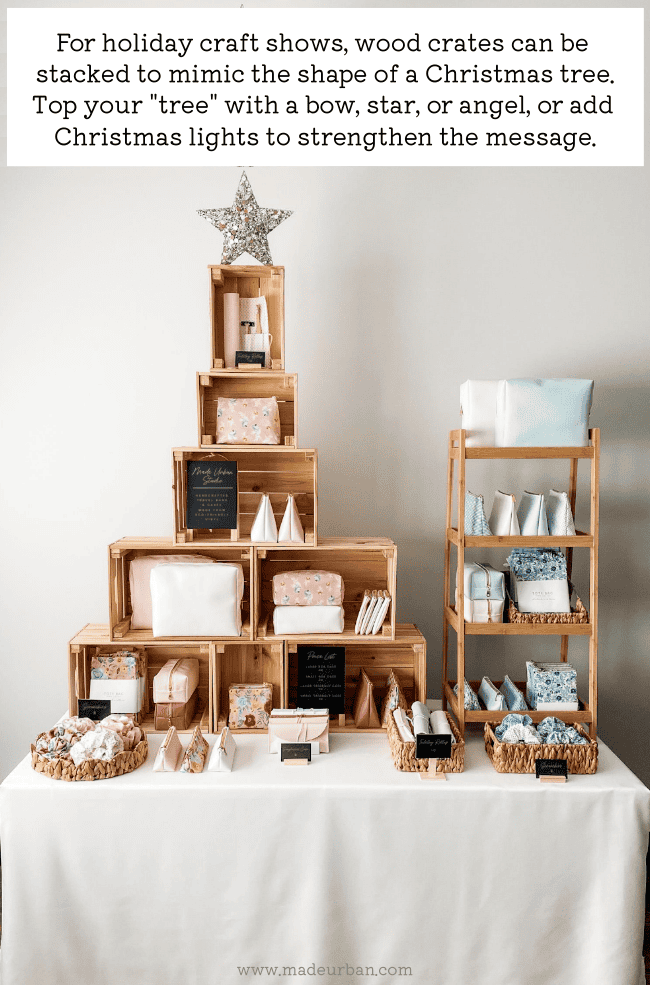
During the holidays, stacking your crates to build a tree shape can make a bold statement and get shoppers thinking of your products as gifts.
Top the tree with a star or bow to make the Christmas theme more obvious.
You can go big or small with your tree shape; just be sure it’s secure.
6 – Floor stacking
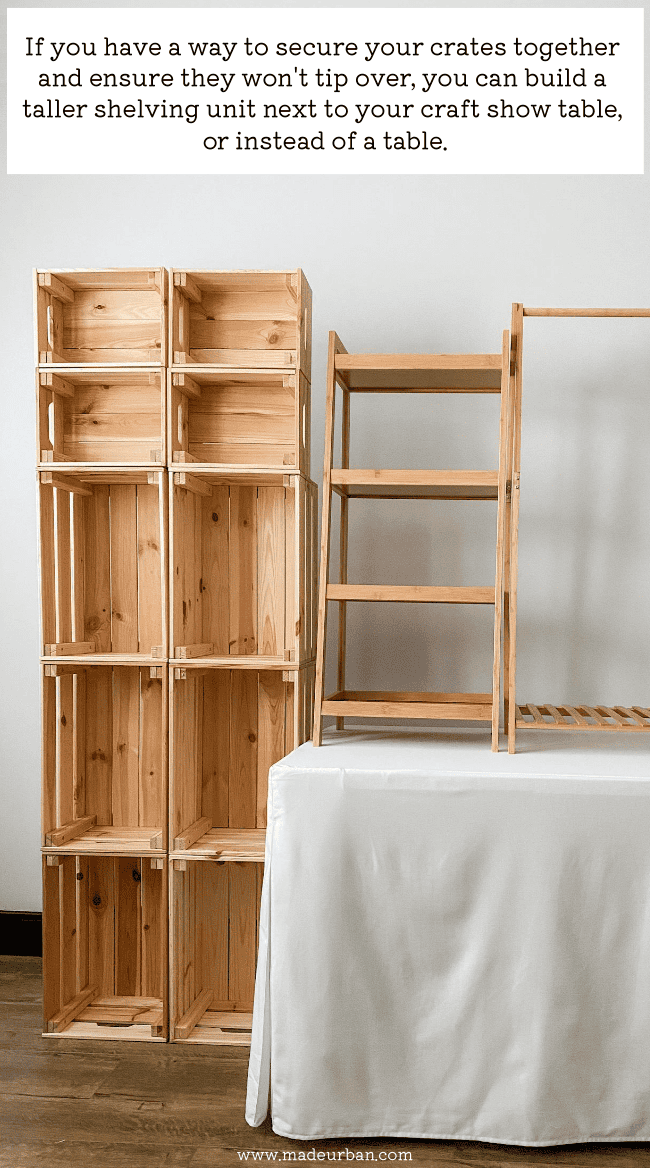
If you have a larger 10 x 10 booth or are able to swap out your 6-foot table for a smaller one, you may decide to use crates to build a taller shelving unit.
In this scenario, you should find a way to temporarily secure the crates together and ensure the unit won’t tip over.
Products shown in photos above:
-
4-tier ladder shelf (currently available in white and black)
- Bamboo options:
7 – Add color
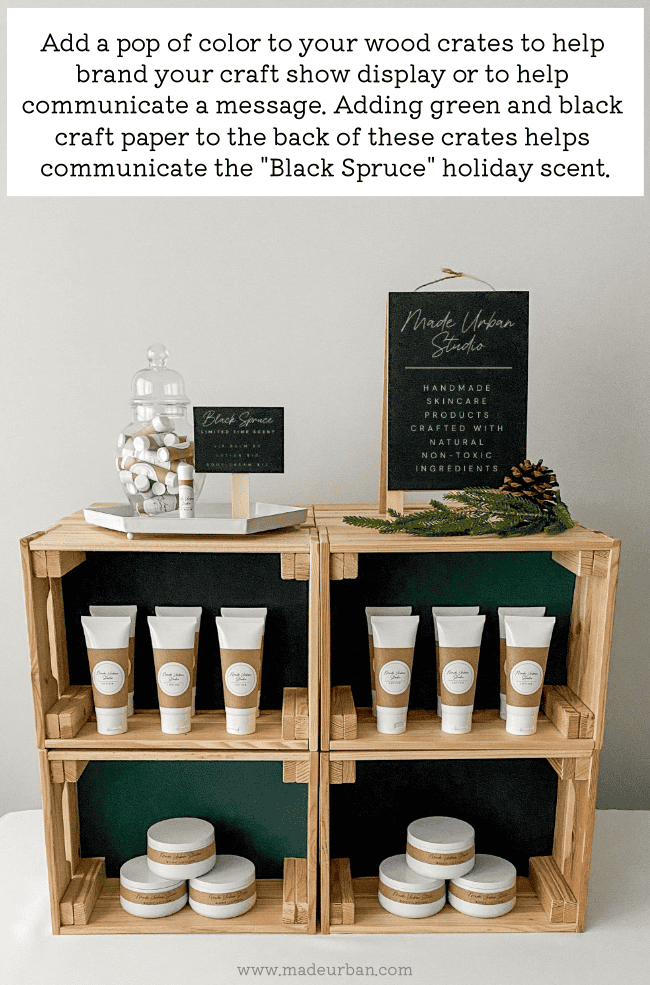
To make your display feel more branded, or to help tell a story (e.g. a “Christmas story”), you can use craft paper or paint to add color to your crates.
If you have your brand colors (here are 3 (easy) steps to define your craft business’s brand), you may decide to paint your crates in one of those colors to make your booth more recognizable, elevate your display, and set it apart from other vendors using wood crates.
When launching a new product line, you may simply add a pop of color to the back of your crates.
For example, the black and forest green background might help tell my product’s “Black Spruce scent” story.
8 – Add hooks
If your crates are made from thick enough wood, you can purchase screw-in hooks. Pre-drill holes slightly smaller than the diameter of the screw end and then screw the hooks into the crates (sides or back) so you can hang items such as earring cards, scrunchies, ornaments, etc.
Depending on the spacing on your crate panels, you may be able to use a slatwall hook (something like this).
Don’t hang anything too heavy off your crates, unless you have a way to secure the crates to the table and ensure they won’t tip over.
Another option (if you’ll only ever use the crates for hanging space, and the wood is thick enough) is to drill holes in the crates and glue dowels in those holes.
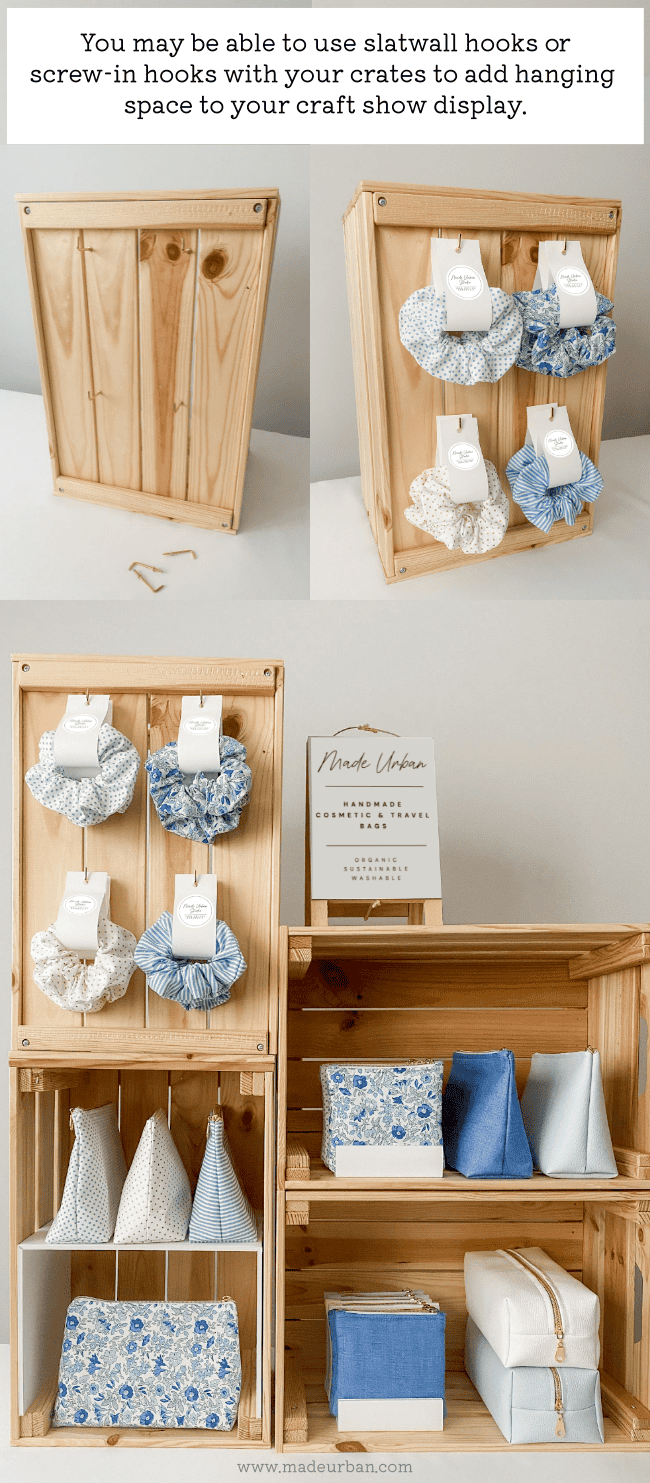
I purchased L-shape screw hooks. This set has a variety of lengths.
9 – Add interior shelving
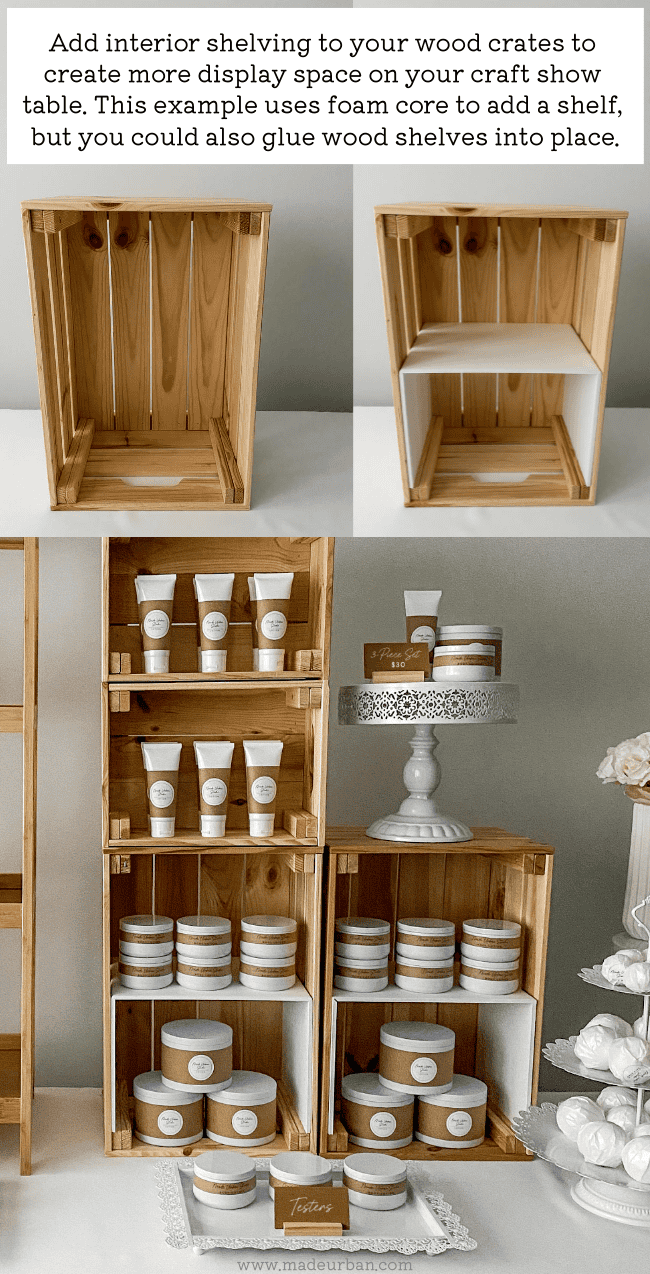
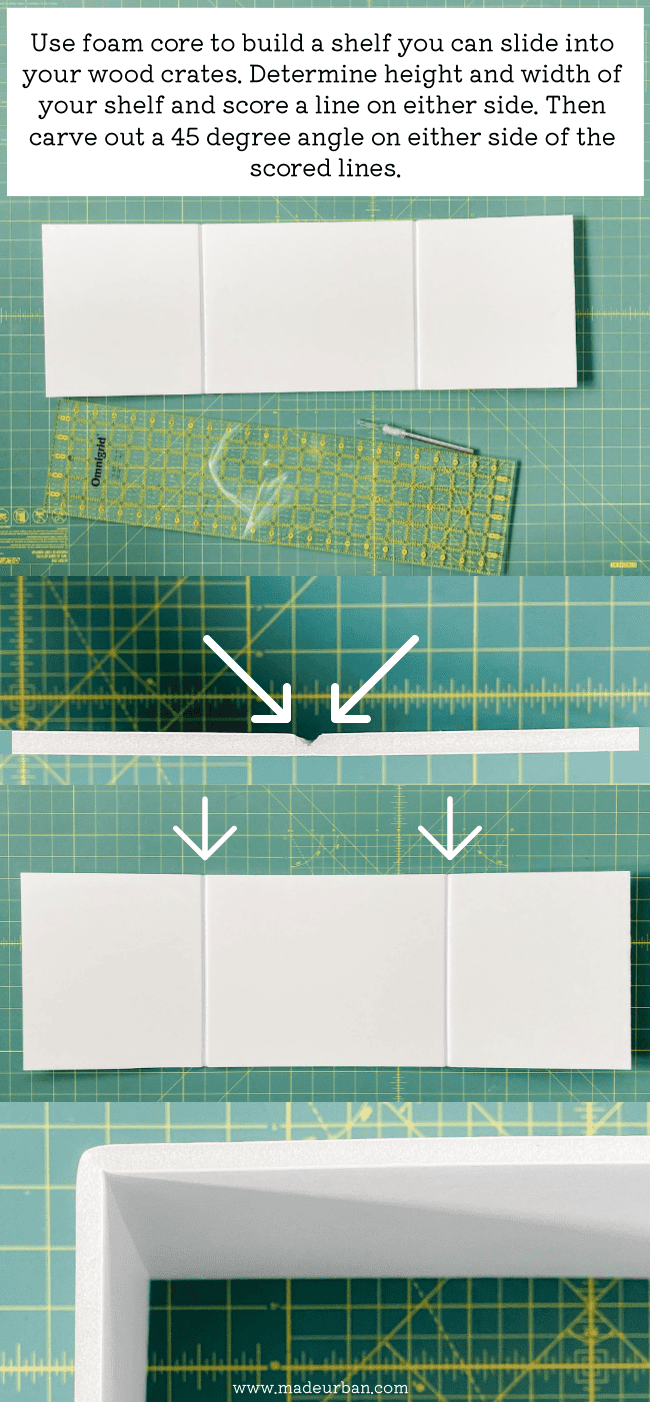
If your items are smaller, you may have a lot of wasted space within your crates. You can use wood or foam core to build shelves within your crates and add a second layer of display space.
I used foam core to create the interior shelves shown below.
I hope this article gave you some display ideas for your next craft show!

Hey, I’m Erin 🙂 I write about small business and craft show techniques I’ve learned from being a small business owner for almost 2 decades, selling at dozens of craft shows, and earning a diploma in Visual Communication Design. I hope you find my advice helpful!

Your ideas are genius! Thank you for sharing your tips so generously.
Thank you so much Cathy! I’m so happy you found them helpful 🙂
~Erin
Hi Erin,
I just want to say how much I enjoyed this article! It is full of so many creative ideas!
Thank your time in putting it together.
Blessings,
Lillie K.
SC
I’m so happy to hear that Lillie! Thanks for taking the time to read it and comment 🙂
Hopefully the ideas come in handy for your next craft show.
~Erin
Hi Erin, thanks for these awesome crate ideas.
I have always struggled with optimizing, but not overcrowding, a tabletop display. Most of the smaller one-day shows only provide a 6 ft table which offers very little space compared to the 80 square feet of a booth in larger craft show !
I especially like the idea of the foam core shelf and the t-stand, it seems like it could easily become a combo!
I am wonderinf if you have written any aticles about how to reinvent my venture. I’m looking for an exit strategy for my
current products. I’m planning to head into a new venture but I have no worthy ideas of what to do with my stock of unsold products. Is this something you have encountered before? Or know where I can do some research ?
Thanks again for all you do and the helpful hints, Michele B
Hi Michelle!
Yes, a 6 foot table definitely challenges you to think about which stock gets the spotlight.
In regard to your new venture, there are a few things to consider…
How different is your new venture/products from your current products? If they’re not too different, you might be able to dedicate the end of your table to “old stock”. This article briefly explains where I might place stock that doesn’t quite fit with the overall theme of my table: https://www.madeurban.com/blog/6-simple-ways-to-improve-a-craft-show-display/ (near the end of the article under “Step 6”).
If the new and old stock is too different, and you wouldn’t really mix them on a craft show table, you might consider signing up for a craft show or two (preferably one with lower table fees) with the intent to sell off your old stock. I would use signage that communicates you’re simply “closing” the business (or whatever wording you prefer) so shoppers understand why the selection is limited or prices are marked down.
If you don’t have enough of your old stock to fill a craft show table, then perhaps online may be the way to go. If you don’t have an Etsy shop or website, you could try platforms like Facebook marketplace. If you do have a website, you could create a sale section/page and list your old stock there.
I hope that helps!
~Erin
Brilliant article! As all of yours are. Thank you so much!
Thank you so much Debbie! Glad you enjoyed it 🙂
~Erin
I’ve been trying to find the shelves that you use. It looks like you have a white and wood version of the little three tiered shelf. Could you share where you purchased them? Thanks so much!
Thanks for asking Heather! I added my affiliate links to the article. Here’s the one for the white shelves: https://amzn.to/4hlJMMg