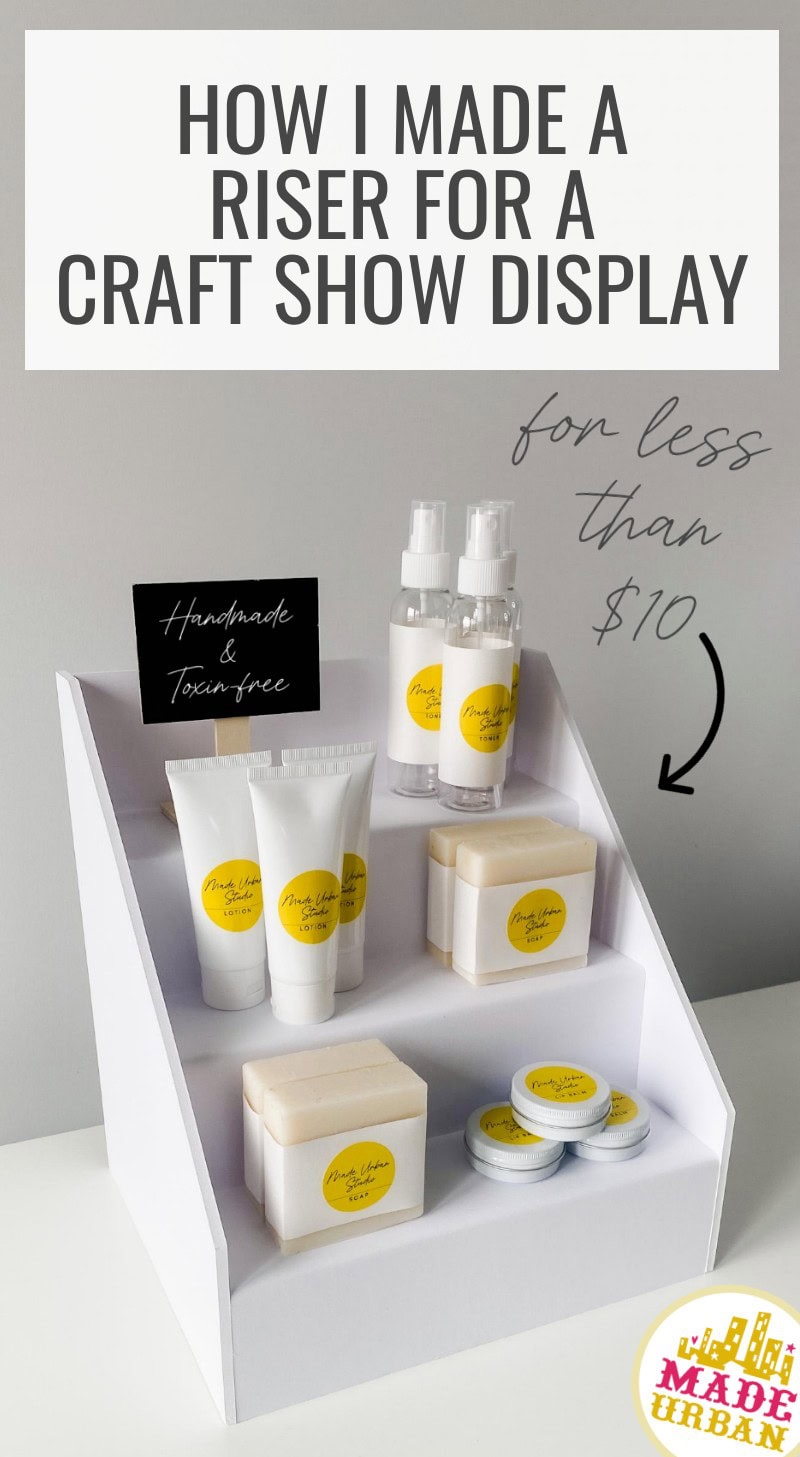
How I Made a Craft Show Display Riser (for under $10)
This riser is simple to create, lightweight, and budget-friendly so it’s perfect for craft show displays.
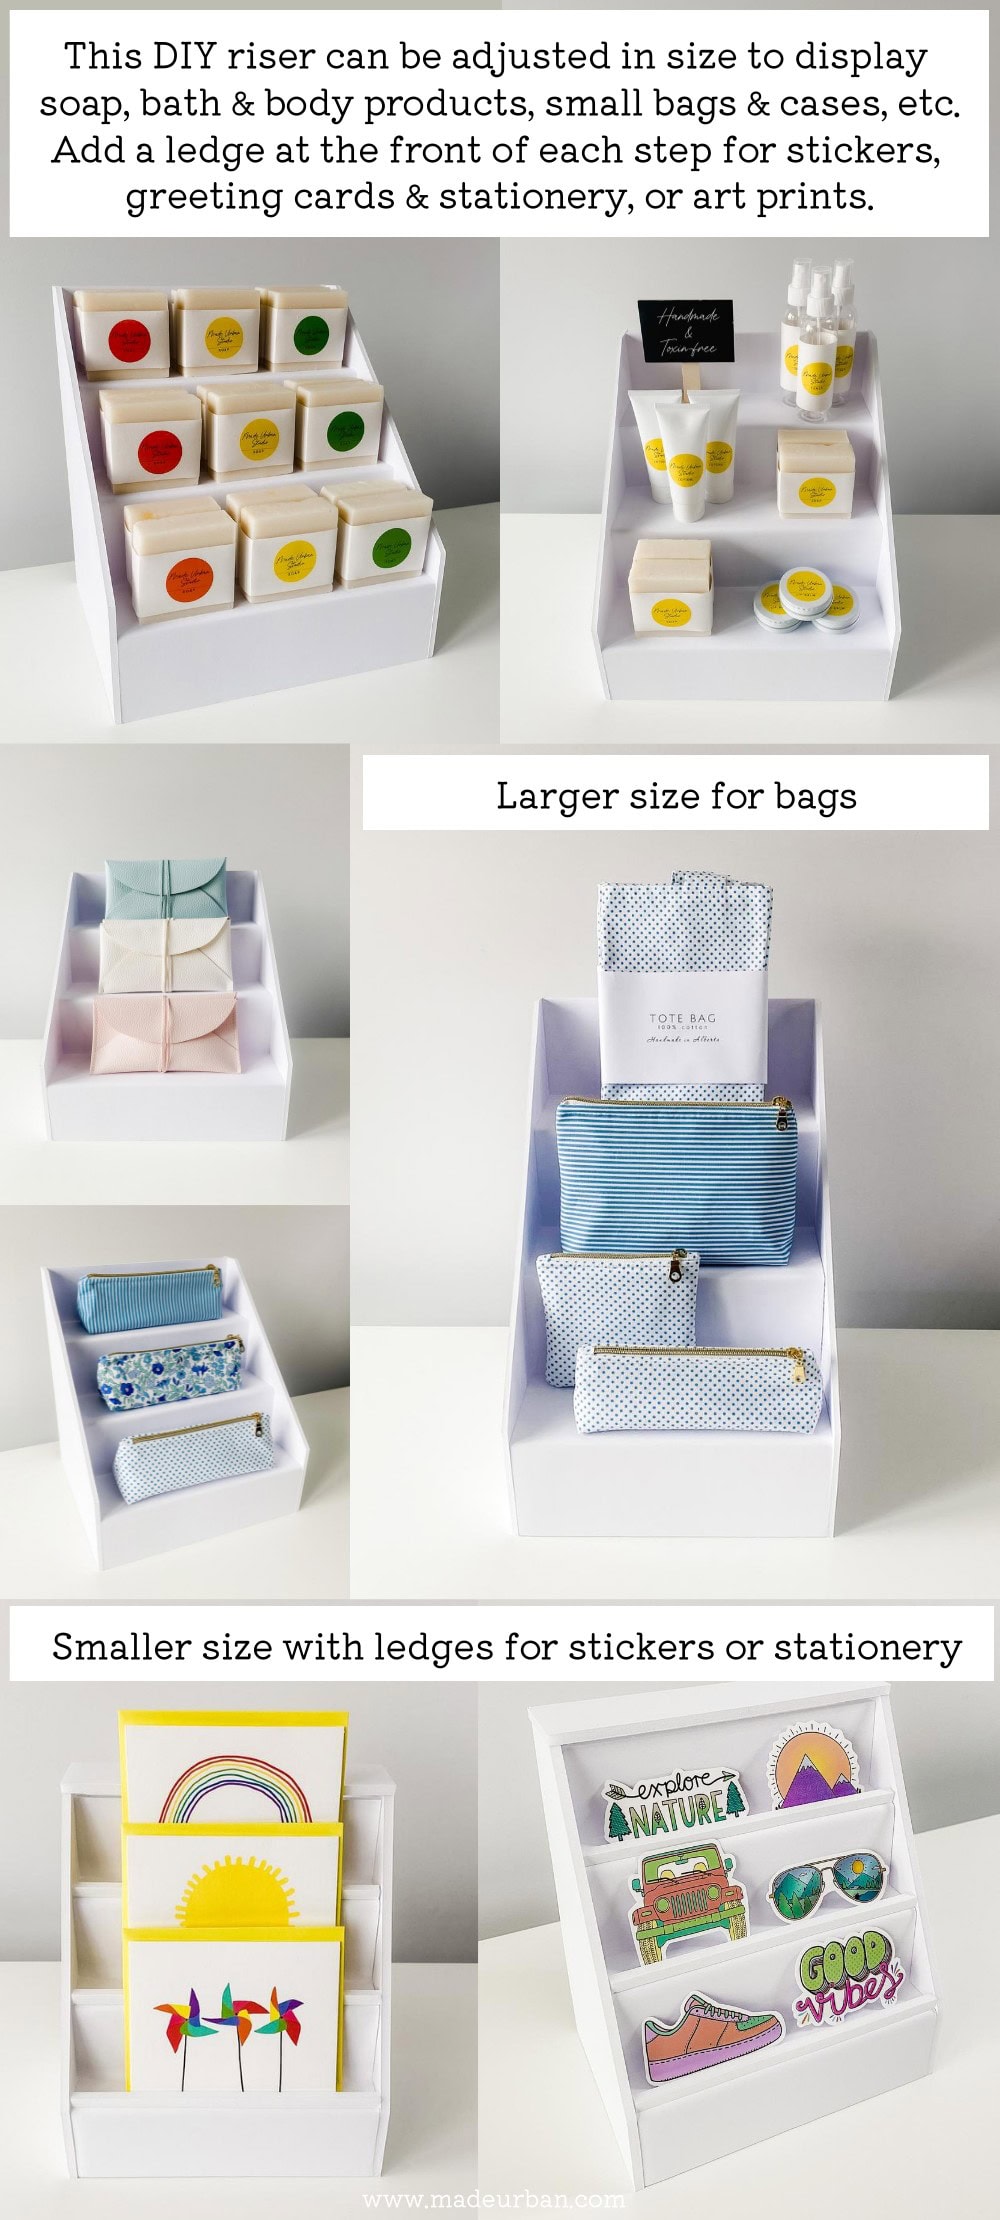
It can be used for a variety of items:
- Small bags and cases
- Bath and body products
- Jewelry (that’s displayed on cards)
If you add a little ledge at the front of each step, it would also work well for:
- Art prints
- Cards and stationery
- Stickers (scroll down for the sticker display riser sizes)
You can make it the size you need and simply adjust the measurements in the following steps.
*This article includes affiliate links, meaning I get a commission if you decide to purchase through my links, at no cost to you. Read full disclaimer here
Materials
- Foam core board (22″ x 28″ or bigger for these instructions)
- Ruler
- X-acto knife
- Pencil
- Hot glue gun & glue
- Square (optional) (I used a carpenter square, similar to this one. You can use a square ruler or anything that has a precise 90-degree angle)
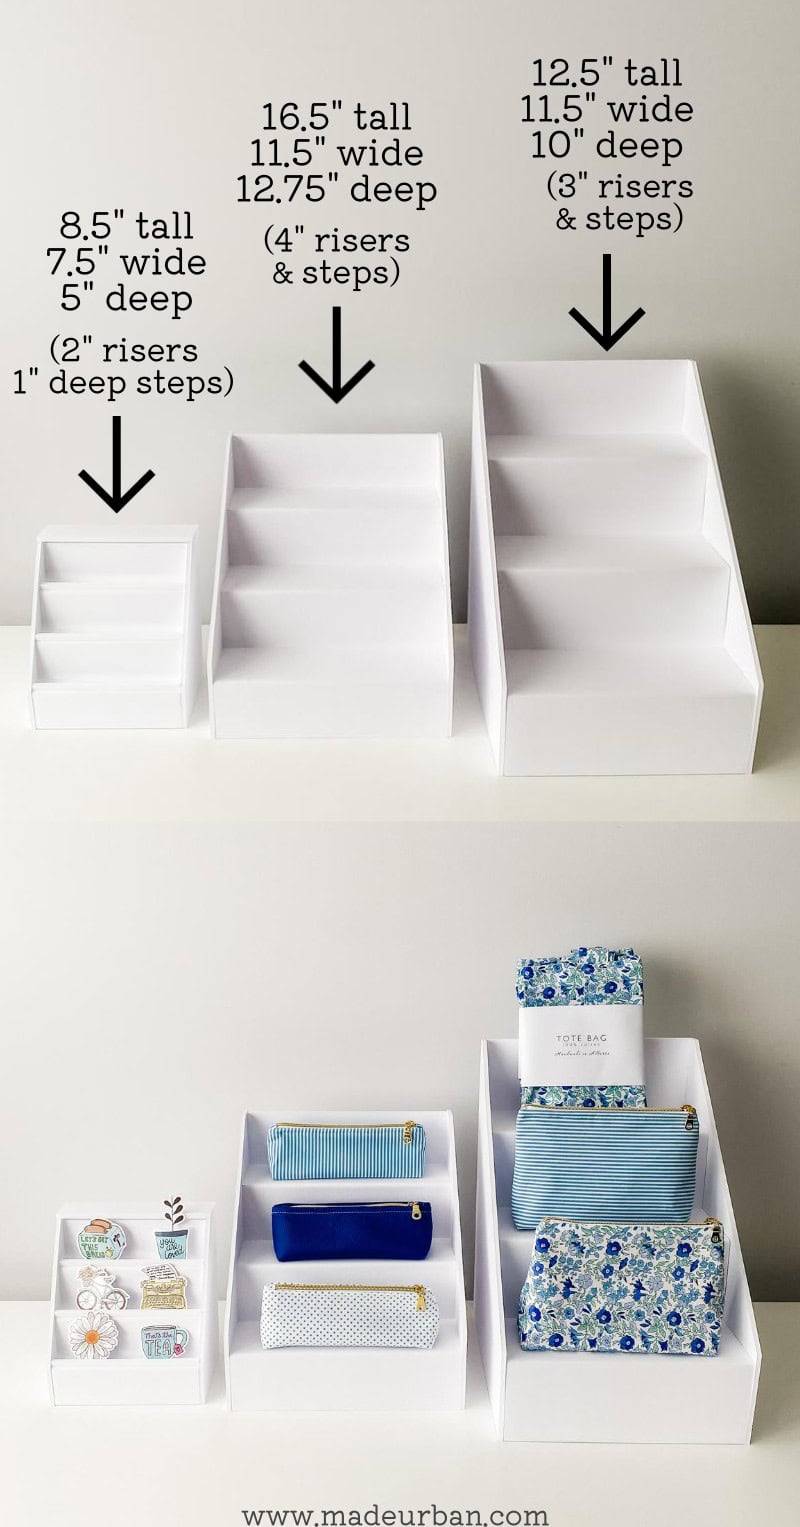
You can adjust the size of your display riser as needed.
I created the tallest riser (shown in this tutorial) using one piece of 3/16” thick 22” x 28” foam core board.
>> You can purchase the same ones here: 22″ x 28″ foam board (5 sheets)
However, there are many sizes and other color options for foam core board here (or at your local craft store).
You can alter the depth and height of each step and riser to fit your products. If you want to go more than 3” x 3” steps and risers, you’ll need a second piece of foam core board.
Step-by-Step Video
Some steps are a little harder to explain, so please watch the video for extra guidance.
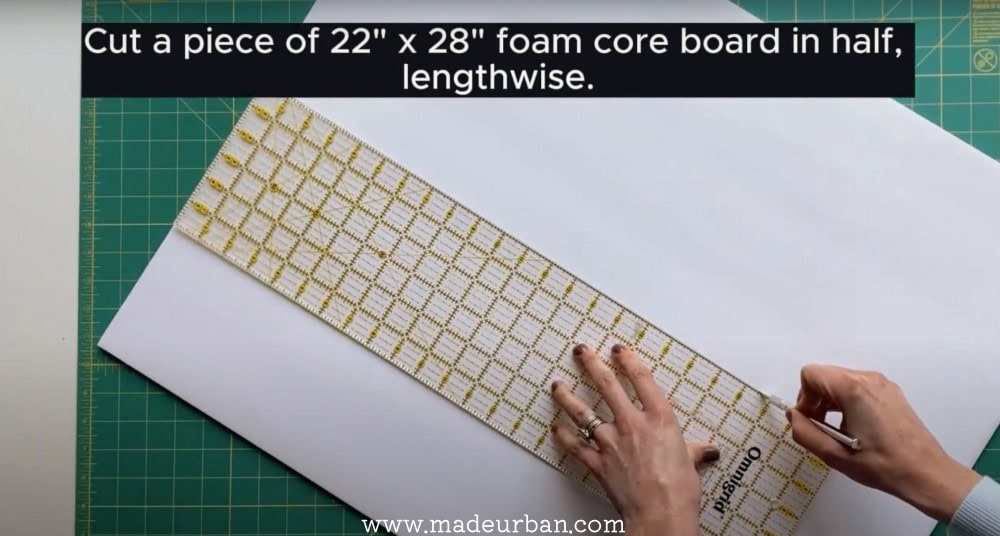
Step 1 – Cut foam core board in half
You’ll have two pieces that are 11” wide by 28” long.
Set one piece aside.
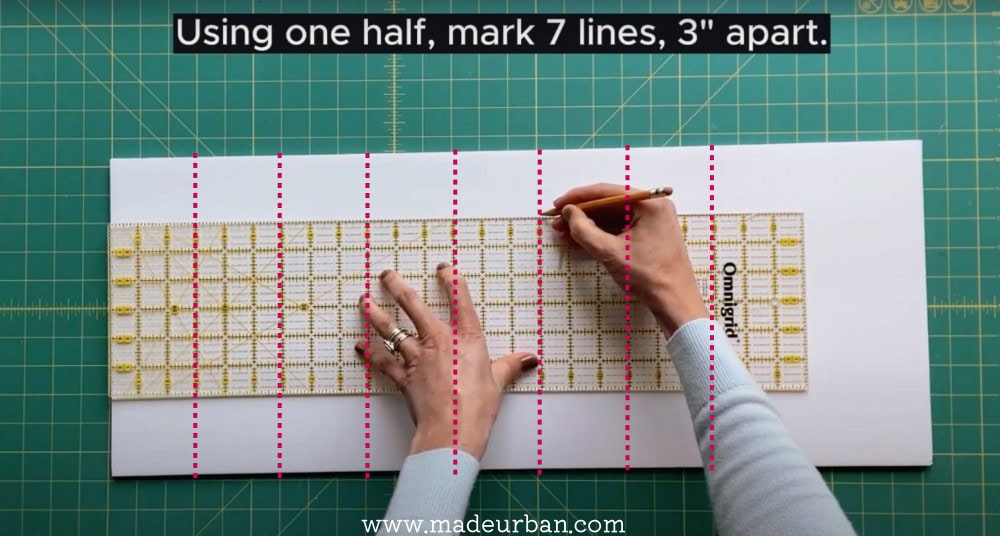
Step 2 – Mark riser steps and risers
Mark 7 lines that are 3” apart.
Cut the foam core board at the last line, so you now have a piece of board that is 11” x 21”.
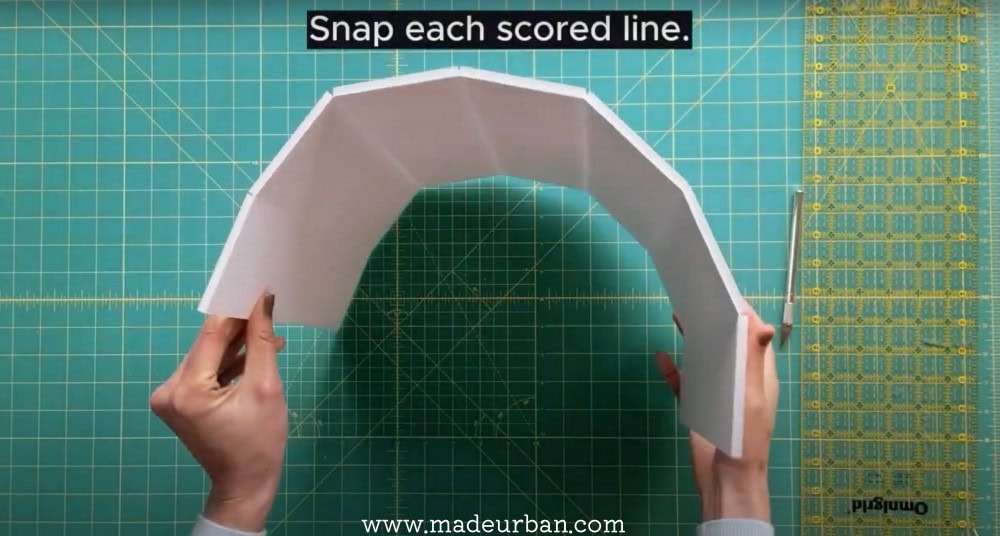
Score each line and then snap the foam core board along each scored line.
Step 3 – Create mitered edges
*This step takes some practice and is harder to explain in words; the video will help. Be sure to use a sharp blade to get clean lines, and consider practicing your cuts on a scrap piece of foam board first.
Every other scored line needs to have mitered edges so the foam core board can fold in and create a 90-degree corner.
*To help explain this process, the following photos are shown up close on a smaller piece of foam board.
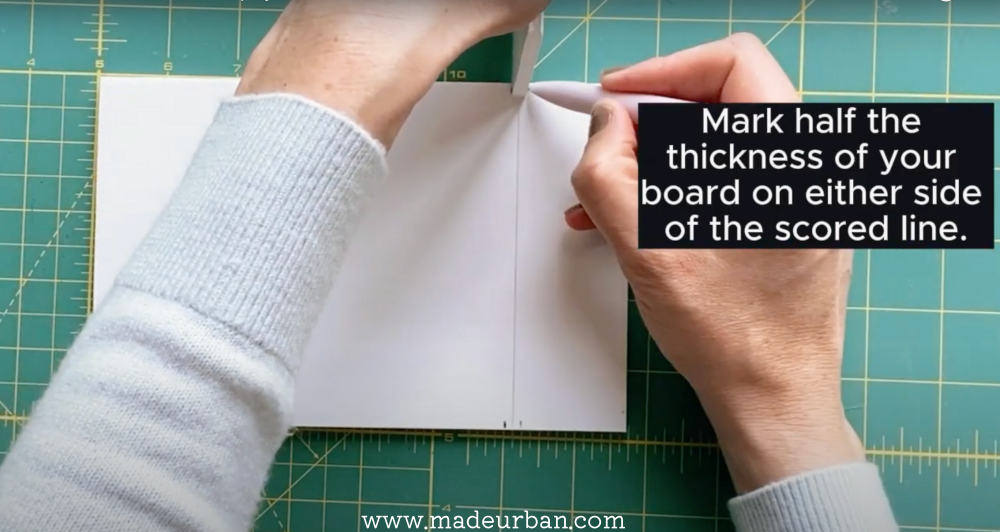
Mark half the thickness of your foam core board on either side of a scored line.
I find it easiest to centre a piece of scrap foam core board on the scored line and mark on either side of it.
Score those new lines; you simply need to go through the paper.
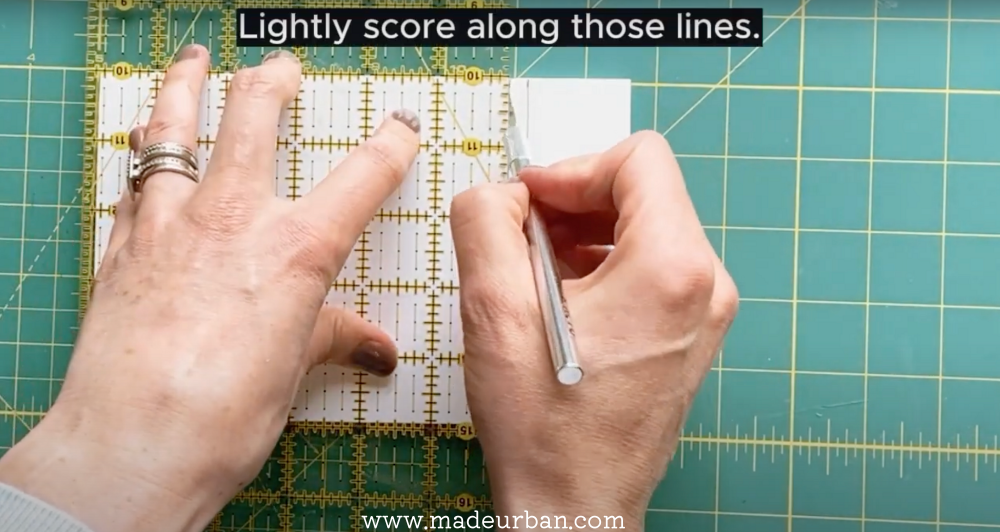
Place your X-acto knife at a 45-degree angle and run it along the outside scored line, in toward the centre scored line.


Repeat this cut on the other side.

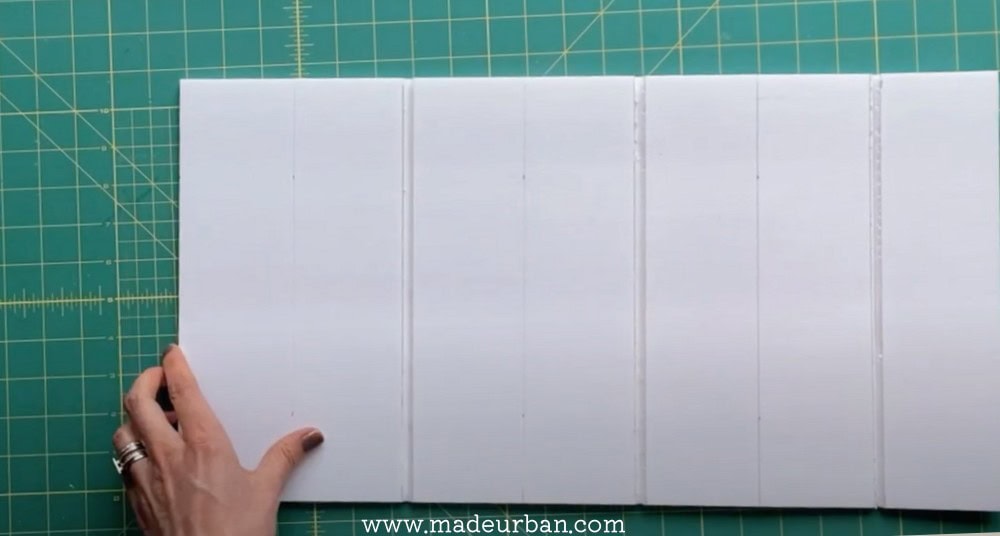
You’ll now have a channel, which will allow you to fold the board inward to create a clean 90-degree corner.


Make this mitered cut on every 2nd scored line.
Step 4 – Glue mitired edges
Run a bead of hot glue down the centre of one mitered edge and close the edges together.
Use a square to check that you have a 90-degree angle and hold in place until the glue starts to dry.
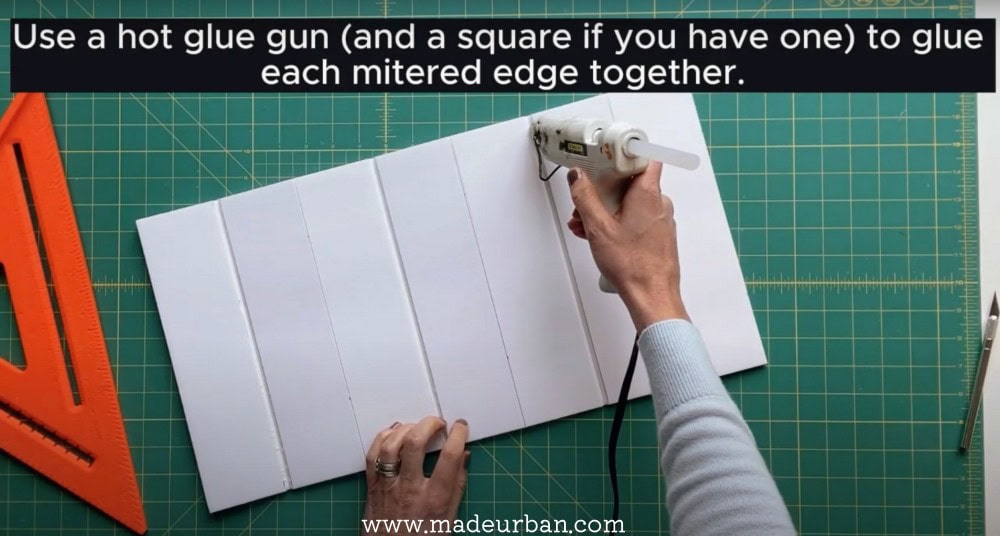
(This was about 30 seconds for me)
Repeat this for the other two mitered edges.
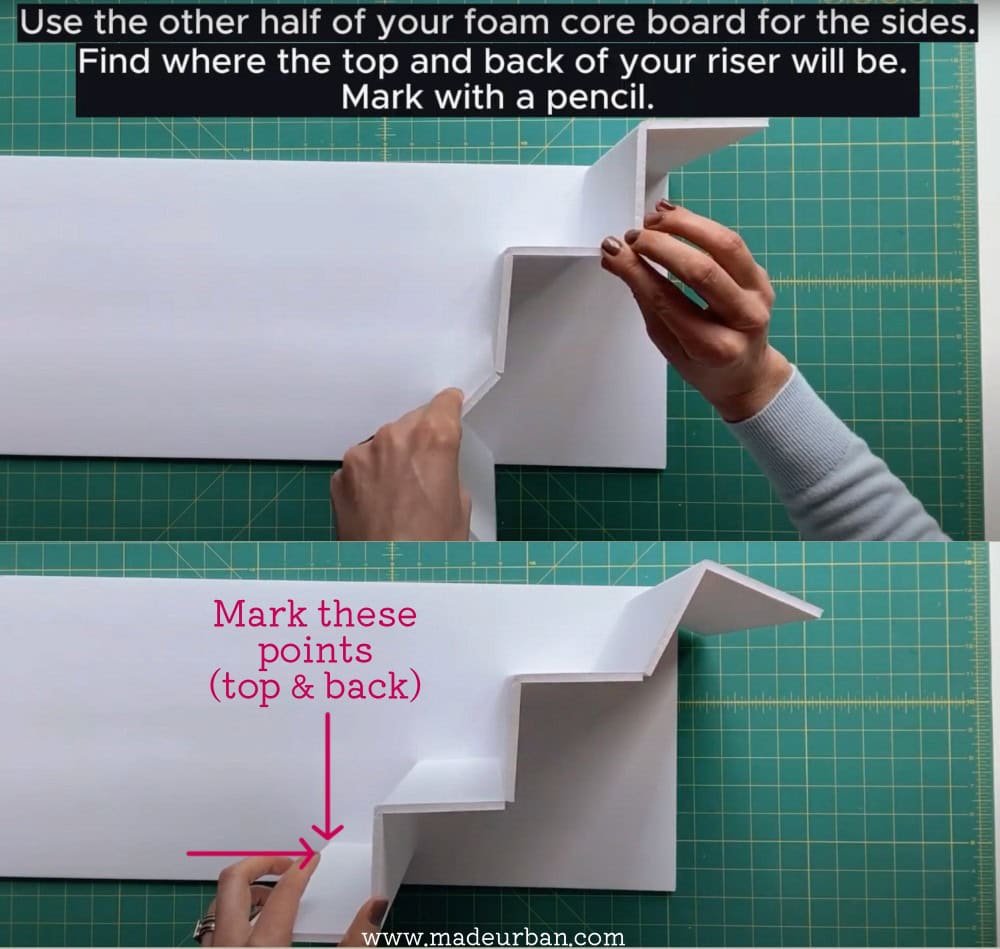
Step 5 – Cut riser sides
We’ll use the other half of the foam core board for the sides of the riser.
Set your riser onto the other piece of board, lining up the bottom corner and front edge of the riser with the bottom corner and front edge of the side panel.
Dry-fit into place and mark where the top and back of the riser will end.
Mark 1” in front of where your riser will end and 1” up from the bottom step.
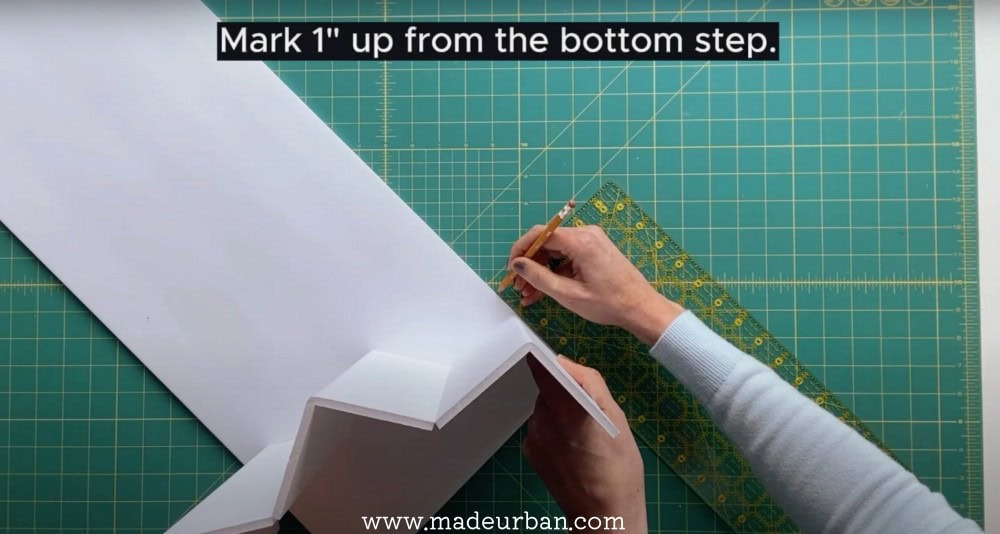
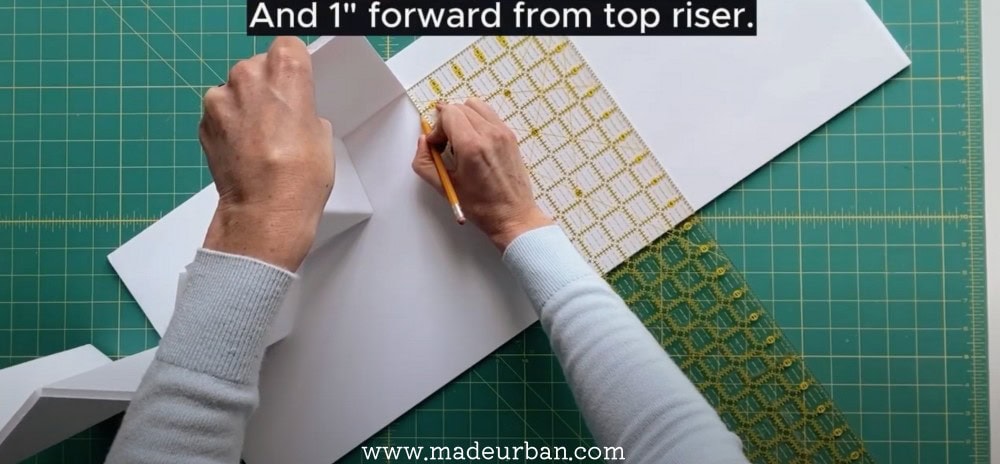
Use a ruler and pencil to connect those two marks (to get the angle of your sides) and mark the top and back of your side piece.

Cut along those lines.
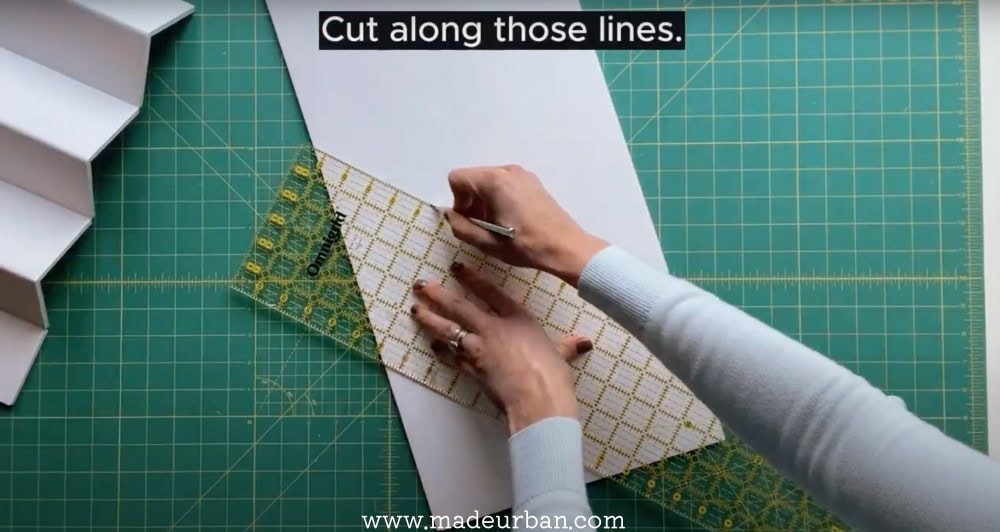
Trace that piece to cut the second side panel.
Step 6 – Glue riser to sides
Line up the bottom and front edge of the riser with the bottom front edge of the side panel.
Run a bead of hot glue on the side panel along the back side of the first step and riser and then press the riser into place.
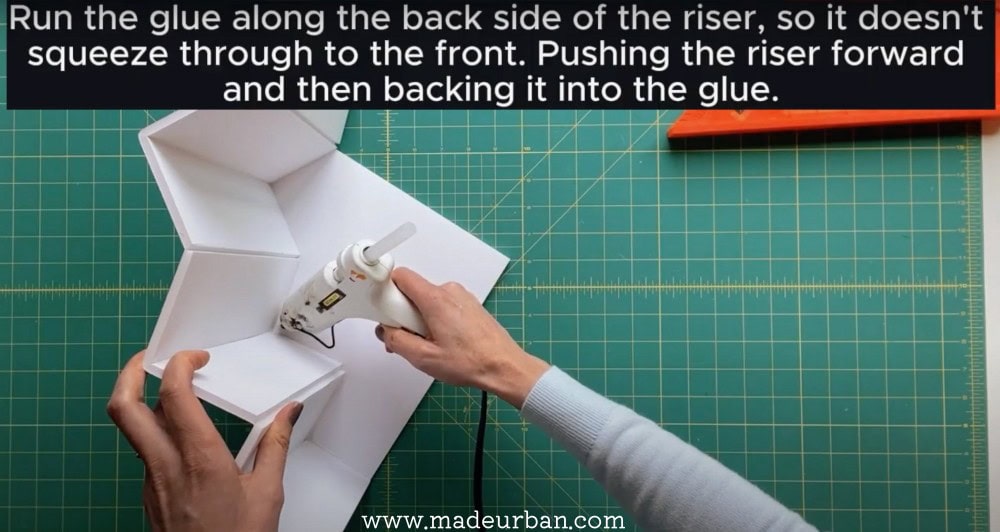
Repeat this for each step and riser, using a square to ensure 90-degree angles.
Once done, glue the other side panel into place.
Sticker Display Riser
I made a smaller size of this riser, which is perfect for stickers.
I started with a piece of foam core board that is 11″ x 8″.
The risers are 2″ tall and the steps are 1″ deep. So score lines at 2″, 3″, 5″, 6″, 8″, and 9″.
Other than that, you can follow the same steps in this article.

Options
This riser is quite sturdy on its own. However, if you plan to use it at outdoor shows, you may want to add some weight to it.
In which case, you could add a piece of foam core board to the bottom and back of the riser, adding small rocks or a few cups of rice before closing it in.
You want to add enough so that it will keep the riser in place if a gust of wind comes up, but not so much that it might break open the glued edges.

Hey, I’m Erin 🙂 I write about small business and craft show techniques I’ve learned from being a small business owner for almost 2 decades, selling at dozens of craft shows, and earning a diploma in Visual Communication Design. I hope you find my advice helpful!