How To Make Candy Heart Props for a Craft Show Display
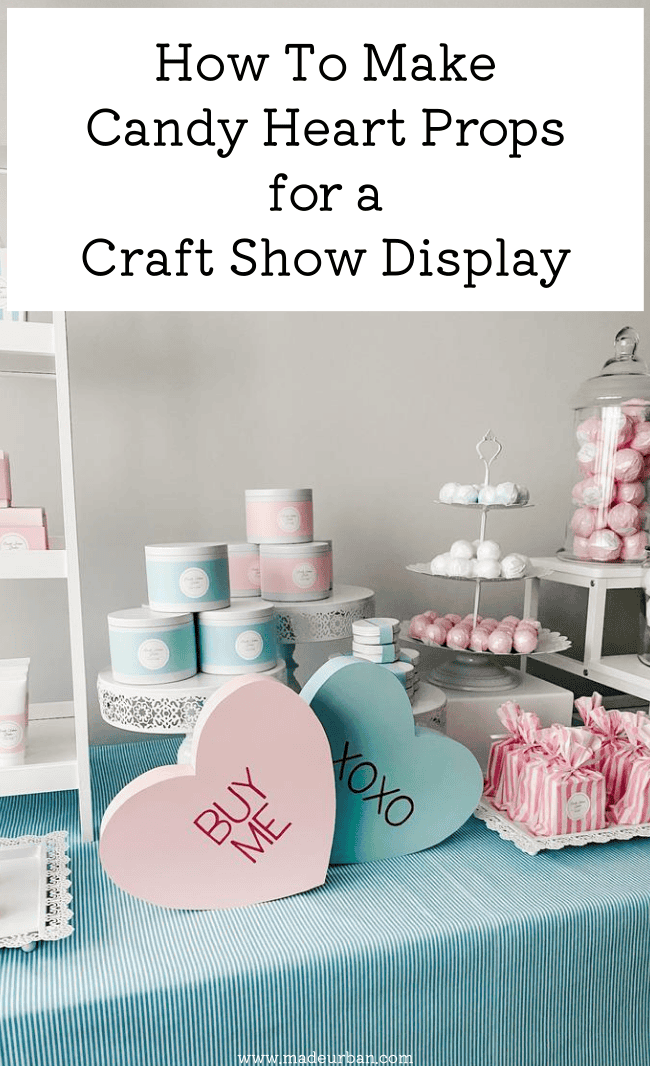
If you want a fun, eye-catching prop for Valentine’s Day, this project is simple and cheap.
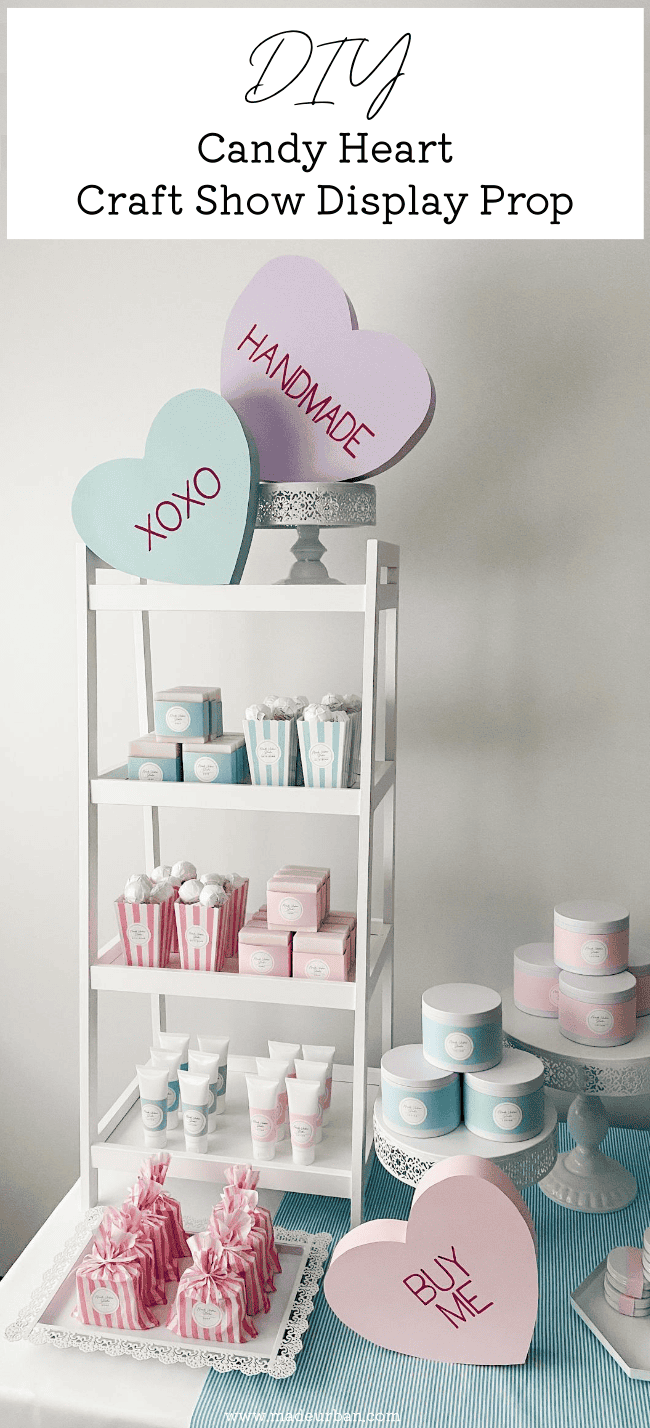
You may use this in a craft show display or as a prop for your online photos.
Choose any colors or phrases you like; you can even create red cinnamon hearts if that fits your brand/product colors better.
Materials
- Foam core board (or it may be called foam board by some suppliers)
- Craft paper/poster board
- X-acto knife
- Hot glue gun (or craft glue and tape to glue foam core pieces together)
- Glue stick or spray glue (to adhere craft paper to foam core)
- Pencil & eraser
- Marker
Step 1 – Create a heart template
The size of your craft paper and piece of foam core board will determine how big you can make your hearts.
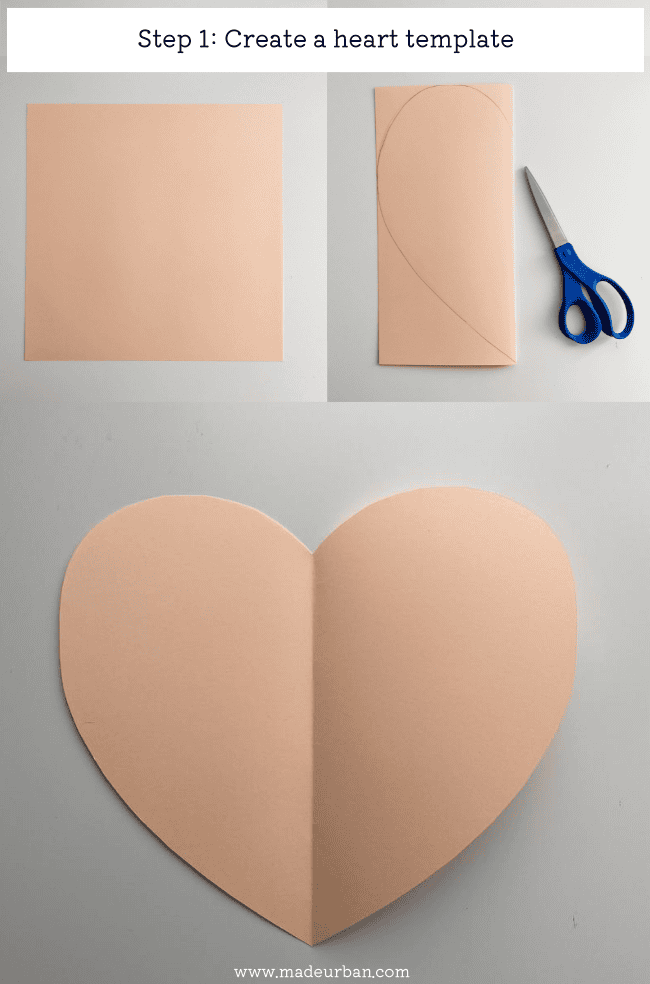
Take a piece of your craft paper and fold it in half.
Outline the shape of half a heart and then cut it out.
Unfold the craft paper and you’ll have a symmetrical heart to use as a template for your foam core and craft paper pieces.
Step 2 – Cut heart shapes
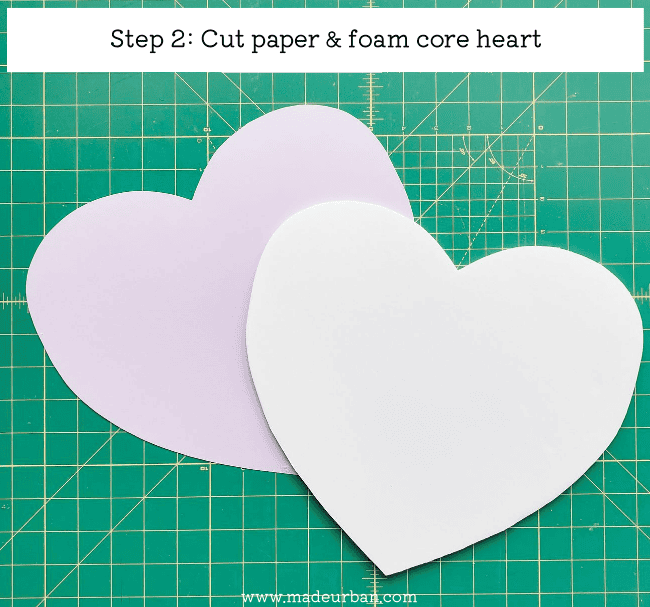
For one candy heart, you’ll need:
- 1 foam core heart shape
- 1 craft paper heart shape
*For a cleaner look from the front, it’s best to make your paper heart slightly bigger than the foam core heart.
(If you plan to hang your candy hearts or they will be seen from the front and back, you’ll need 2 foam core hearts and 2 craft paper hearts.)
Use your heart template to trace the heart shape onto your foam core and your craft paper.
You’ll need to use the X-acto knife to cut out your foam core heart (and can use scissors or an X-acto knife for the paper heart).
Step 3 – Cut foam core side panels
To make this candy heart 3-dimensional, we need side panels.
Measure the circumference of your foam core heart to get a rough idea of the length of your side panel.
You’ll likely need to patch 2 or more panels together to wrap around the heart.
Determine the depth of your side panels. You want it wide enough it will be sturdy.
I cut my side panels 2” wide.
Step 4 – Score side panels
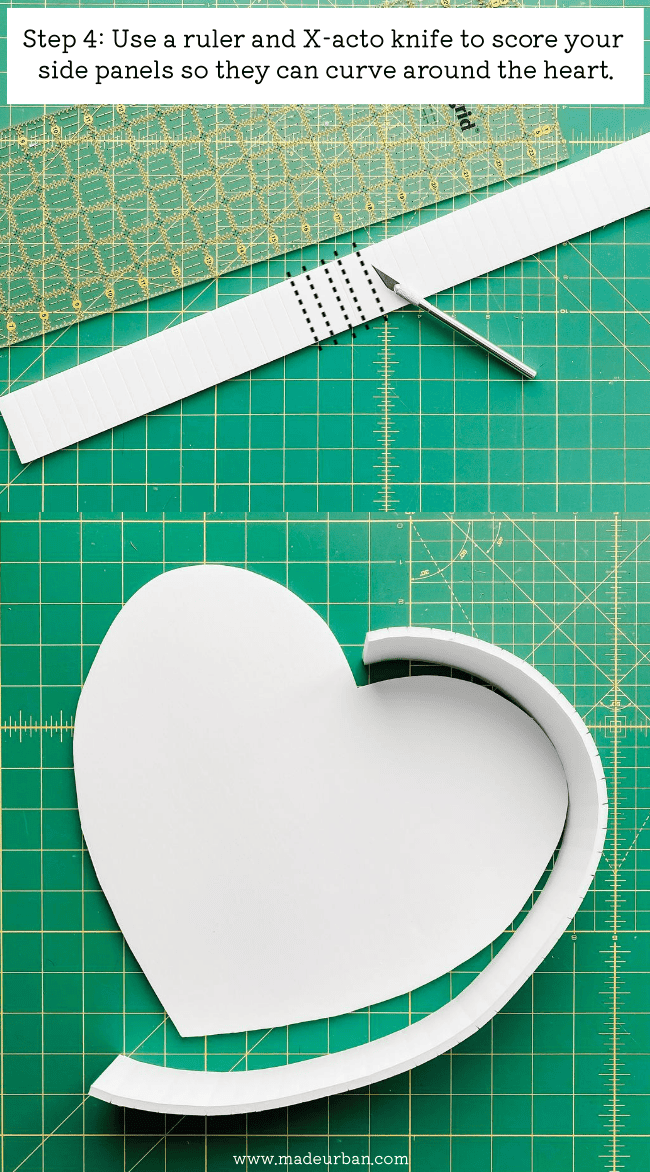
To curve the foam core around the shape of the heart, you need to score the side panels.
Use a ruler and an X-acto knife and lightly score a line so the cut goes through the first layer of paper and part of the foam, but doesn’t cut the second layer of paper.
It’s better to work in light strokes and only score 1/2 way through, as you’ll snap the scores at the end, which will break the foam down to the second layer of paper.
The size of your heart will determine the curve of your lines. If your heart is smaller, your curve will be sharper and you’ll need to place your scores closer together.
Start with 1/4” – 1/2” spacing between scores and then check to see how the side panel curves around the heart.
Step 5 – Glue side panel in place
Start at the top middle of your heart and use your hot glue gun to attach your first side panel under one side of the heart.
I found it best to glue the panel in place so the ending of your side panel can go behind it, and close the gap, without needed to cut it to the exact length (hard to explain so please see photo below).
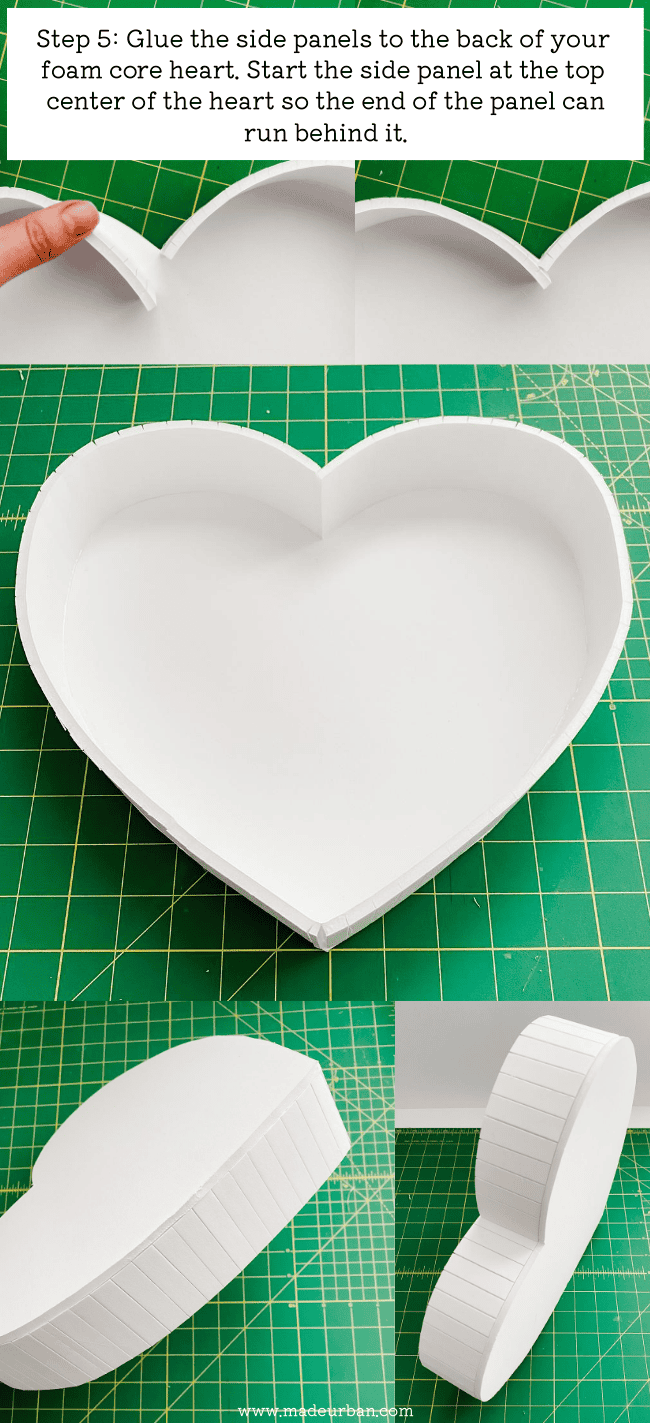
As you get close to the middle of the bottom of the heart, leave several inches loose and make a score right where the middle point of the heart is, so you can bend the panel sharply around the bottom of the heart.
Continue gluing the side panel around the heart.
It won’t be noticeable if you need to use several panels instead of one continuous one.
Step 6 – Write heart phrases
Choose the phrases you want on your candy hearts.
You may use traditional candy heart phrases, such as:
- BE MINE
- LOVE ME
- XOXO
- SUPER COOL
- Etc.
Or you may choose phrases that are more on-brand for your business and products. For example:
- HANDMADE
- SHOP LOCAL
- BUY ME
- GIFTS UNDER $20
- 100% NATURAL
- Etc.
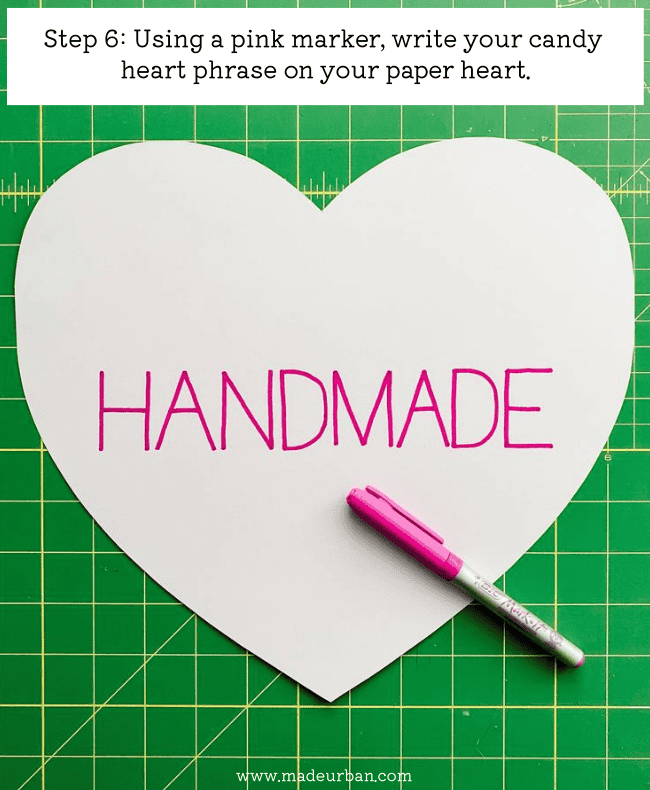
I used a pencil to lightly write my phrase and then went over it with a pink marker.
Step 7 – Cut paper side panels
Measure the depth of the foam core heart sides from top to bottom.
*Your paper side panels will need to be slightly wider than your foam core side panels because your paper needs to cover the thickness of the foam core heart, as well as the width of the foam core side panel.
Then cut enough strips to wrap around the circumference of the heart.
Step 8 – Glue paper to foam core
To attach the paper heart to the foam core heart, it’s best to use a glue stick. More runny glue may get the paper wet and show through, while I found the glue gun dried too fast and created a bumpy surface.
To attach the side panels, you’ll need to hold the paper in place until the glue dries. I found it best to work in smaller sections.
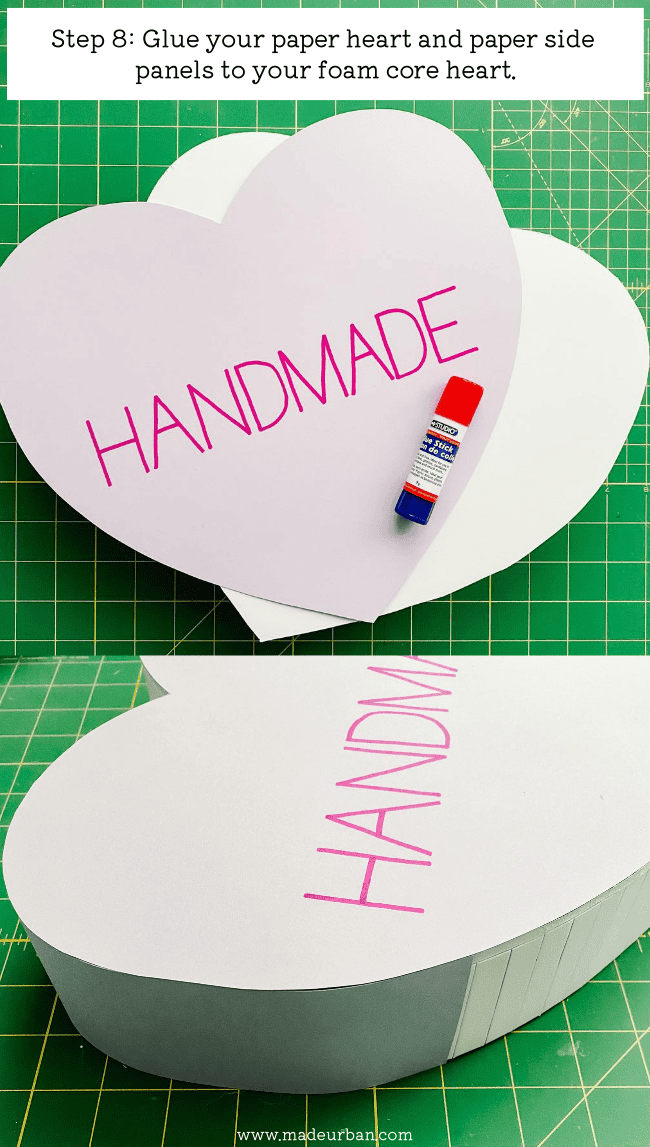
I like the look of the hearts sitting on their sides. But if you want your hearts to sit straight up and down, you can create a foam core stand.

Hey, I’m Erin 🙂 I write about small business and craft show techniques I’ve learned from being a small business owner for almost 2 decades, selling at dozens of craft shows, and earning a diploma in Visual Communication Design. I hope you find my advice helpful!

These are darling, Erin! Makes me want to sign up for a Valentines Fair!
Thank you so much Bettsi! 🙂
Oh, I want to try these!! I love the idea of using phrases like handmade, 100% natural, etc. Thank you for the idea!!
Let me know if you do try them! I liked the idea of different phrases too 🙂
~Erin